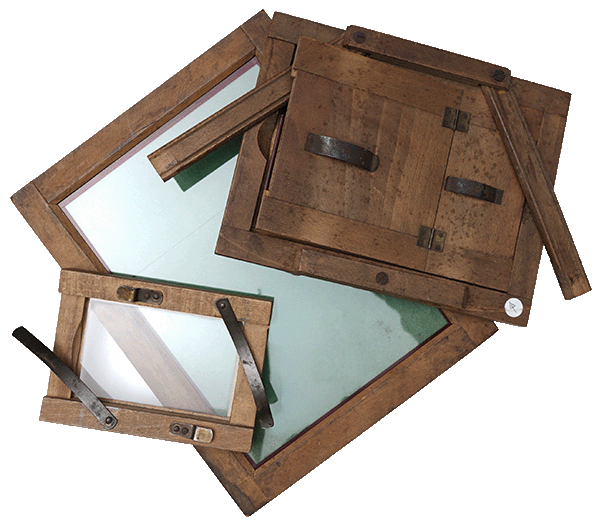
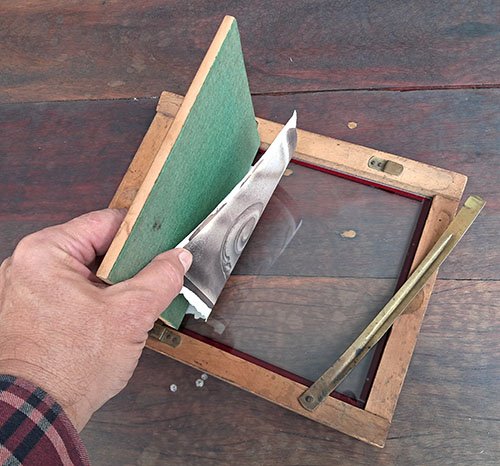
Contact printer
In 1841, when Henry Fox Talbot’s positive negative process, the calotype or talbotype, was perfected and photographers began to adopt it, the contact press made its entrance into photography.
It’s a very simple device. It is used to transfer the image from the negative to the positive, in other words, it is used to print the photograph. The first printing process, which was part of the calotype step-by-step process, was salted paper, later came albumen associated with collodion or wet plates and later still came papers using gelatine as a suspension medium for silver salts and generally associated with dry plates also with gelatine and later still films.
There have been other printing processes such as cyanotype, van dyke brown, platinotype and all of these make use of the contact press. What all these processes have in common is the need for a lot of light, and in general light more in the ultra violet region, which is closer to and more energetic than the visible spectrum.
Enlargers only came later when papers were developed with enough sensitivity to be able to print in much weaker light than the direct light of a clear day.
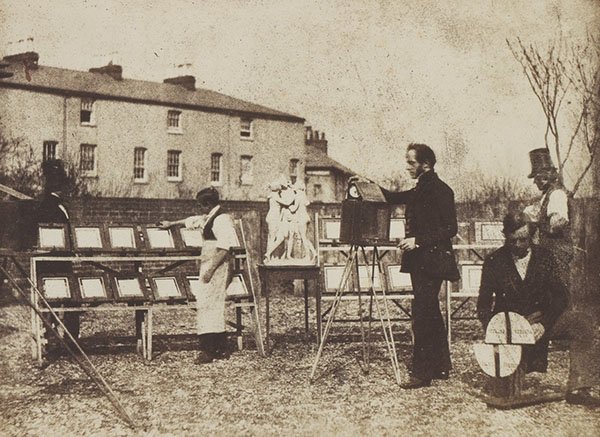
In the photo above, attributed to Talbot himself, we see a series of contact presses in the sun. Perhaps they were printing his Pencil of Nature.
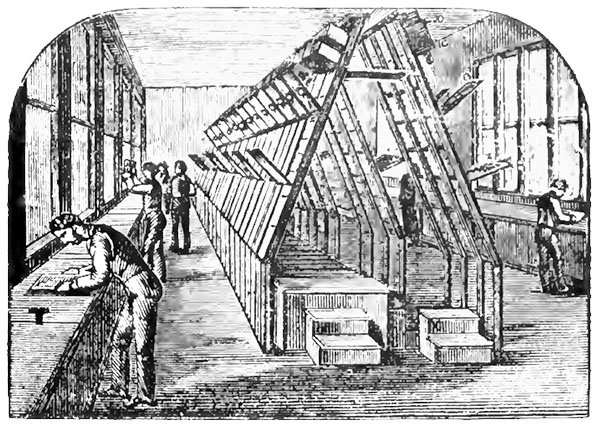
In this illustration from the book The Studios of Europe, from 1882, we see a practically industrial installation, in which the light comes from huge windows on both sides of the shed. From the date, it was probably for the Cartes Cabinet and Cartes de Visite, aimed at large volumes of printing using the contact press.
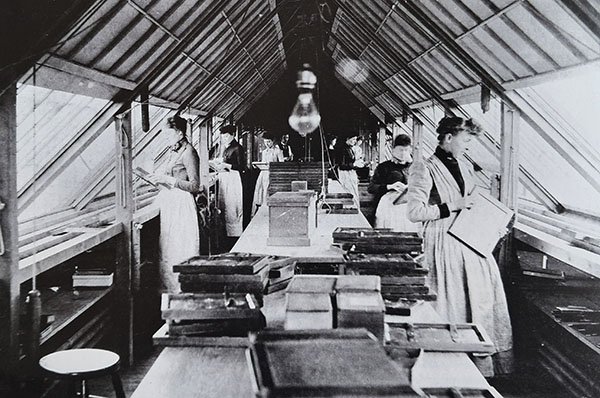
Above, a Kodak facility in Harrow, England, around 1900. Stacks of contact presses on the central counter and windows on both sides to provide daylight. We see a light bulb hanging from the ceiling right in the center of the photo and it begs the question: why didn’t they use electric light, which is more regular than daylight?
Yes, it is more regular but it is much weaker and the papers of the time were sensitized much more by the ultra violet part of the spectrum, as mentioned above, it was at the beginning of the 20th century that more sensitive papers that could be sensitized by the yellowish light of a lamp entered the market and were massively adopted.
How the press works
It’s a bit obvious that it should just provide a firm contact between the negative and the sensitive surface of the paper. this is done by pressing the two against a glass.
The thing that isn’t so obvious is: why did every contact press have a hinged back? To answer this question, we need to consider two types of printing:
1- Printing Out Paper (POP)
The first papers, such as salted paper, albumen and even some gelatine papers, were of the POP type, i.e. the simple incidence of light made the image appear very clear on the paper. The hinge behind the contact press was used to inspect the progress of the exposure, which could take several minutes. After a certain amount of time, one part of the back was lifted to see if it was time to stop the exposure or if it would be better to leave it for a while. The other part kept the paper pressed so that no record was lost if the option was to close the press again and expose more.
As the papers were very insensitive, this quick inspection, carried out in direct sunlight, didn’t even tarnish the photo.
2- Developing Out Paper (DOP)
The most sensitive papers, which were only developed around 1890, don’t just present a visible image when exposed to light. Just like film, once exposed they have a latent image that still needs to be developed. In this case, the articulation on the contact press is of no use. These papers were called Gaslight Papers. The most famous brand, which appeared in many advertisements of the time, was Velox.
Why were the cameras so big?
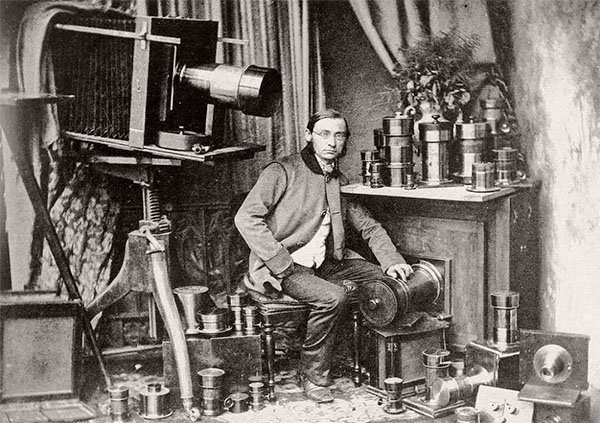
Self-portrait by Hermann Krone, Dresden photographer, around 1858
_
As only contact copying was available until at least the 1890s, it was necessary from the outset, from the moment the photo was taken, to use a negative that already determined the size of the final photo. The miniaturization of film photography, up to the size we now call full-frame, 24x36mm, introduced by Oscar Barnack’s Leica in 1925, depended on many factors, many preconditions. One of them was the development of Developing Out Papers, as mentioned above. It was only then that the contact press was replaced by the enlarger.
That’s a shame, because a contact print made from a large negative is a very beautiful thing. It brings a wealth of detail that is at the highest level that negative can deliver. You can’t see any grain and the grays look very solid. You only have to see one in your hands to feel the effect that contact produces. No matter how good the enlarger lens is, you lose something when you add this extra pass.
Finally, it has to be said that, strictly speaking, there were enlargers that used mirrors to capture sunlight from the outside and direct it into a room where it was used to enlarge a negative. But these were complex and rare machines, some even used as mechanisms to follow the movement of the sun. They were more for scientific use and did not represent the photography of the time.
It’s not that difficult to find a vintage press like the ones shown in this post. But it’s also not difficult to build one yourself. They are indispensable for anyone who wants to do some craft processes such as cyanotype, van dyke brown, gum, salted paper or platinum. Follow this link and see a simple way, which doesn’t require many tools and already gives a very practical result: Build a contact press.