Panoram | Eastman Kodak
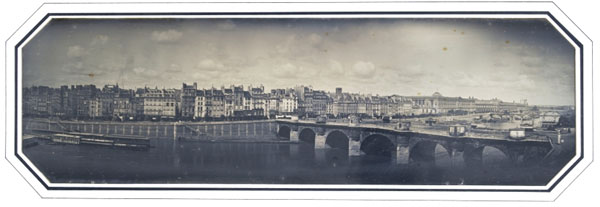
Panoramic images, covering a very wide angle of a scene, have always been very popular ever since landscapes in general entered the history of painting around the 16th century. As soon as photography became a new possibility for producing images, the genre of panoramic photography was immediately developed. As early as the 1840s, panoramic photos such as the one below showing the River Seine passing through the city of Paris were produced.
Camera types
There are basically 3 ways to take a panoramic photo:
1 – Assembly
Several photos are taken with a normal lens and assembled in sequence
2 – Wide angle
A lens with a very wide angle of view is used, usually over 90º, and either in the camera, with a specific plate/film holder, or already in the printing phase, it is cropped to the panoramic format, which is always very elongated.
3 – Rotating lens
In this case, the film is fixed on an arc of a circle and the lens projects the image in a scanning mode by rotating on an axis positioned over the nodal point of the lens.
Each of these methods has its own characteristics and gives very different results. For a detailed discussion showing and explaining these differences, see the article on another panorama, KMZ’s Horizont.
Kodak Panoram 4D
The concept of the Kodak Panoram is that of a rotating lens camera. It produces negatives in the impressive 3½ x 12″ format (88.9 x 304.8 mm) and covers an angle of 142º.
The lens
The Panoram No. 4 was produced in two distinct “optical eras”: In the initial era, 1899-1902, the Panoram came equipped with a Rapid Rectilinear lens, which is a lens with 4 elements in two equal and symmetrical groups. In the 1902-1924 era, Kodak switched to the Meniscus on almost all standard production models. The meniscus is a simple lens, just one element that is concave on one side and convex on the other.
Why change to an inferior model? It was a question of cost reduction, but with some mitigating factors. The rotating lens system is inherently forgiving. Because the lens sweeps the film as it rotates, all parts of the image are captured using mostly the center of the lens. Meniscus’ biggest weakness – distorted edges – is physically circumvented because the edges of the lens never “see” the film. By using the central 10% of a meniscus lens, Kodak has achieved “acceptably sharp” results at a fraction of the cost.
As for field curvature, this is another advantage inherent in the camera concept. In a normal camera, a meniscus lens suffers from field curvature (the focus is in a shell shape, rather than flat like film). In a standard box camera, this is a flaw. In Panoram, the film is already held in a curved arc. The “bad” geometry of the meniscus lens actually adapts very well to the physical curve of the back of the Panoram film. It was a case of two “mistakes” resulting in a “hit”.
The mechanism for rotating the lens
Above is a drawing of Panoram’s patent. In Fig.3 we can clearly see the lens and the flattened cone that crops the lens’ image so that only a slit is exposed while the mechanism rotates the lens.
Of course, it’s very important that the sweep speed is constant throughout the entire journey and the way in which this is ensured is very ingenious. Unfortunately, it’s also not very intuitive to explain, but the basic idea is that the spring indicated as No. 43 is slightly off-center in relation to the axis that rotates the toothed rod No. 45 and therefore has a deformation that varies little along the way, thus offering a constant torque. The result is that when the shutter button is pressed, the lens rotates very smoothly and always evenly. Two speeds are possible depending on how much pressure is applied to the spring. They are about 1/25 and 1/50s. It exposes a photo in one direction and can be set to expose another in the opposite direction, as can be seen below. Note, however, that the film needs to be advanced between each turn of the lens or a double exposure will be produced.
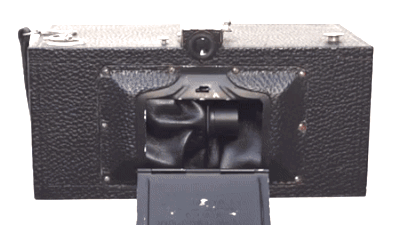
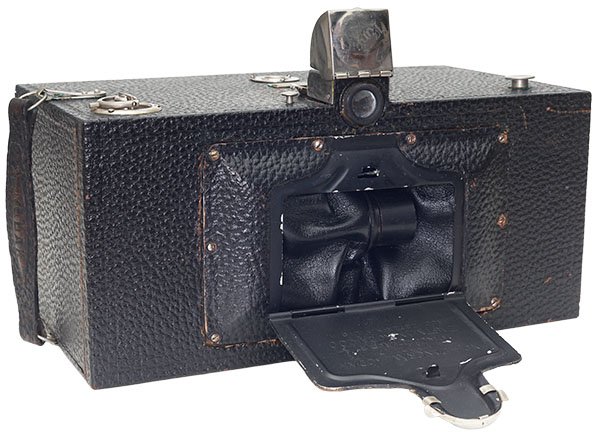
Inside the camera
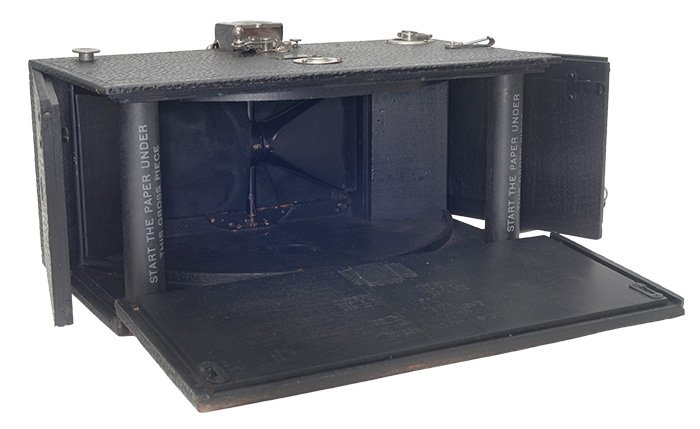
The camera opens at the sides and at the back. The body is made entirely of wood and has fittings to seal out the light. The film is placed in a 142º curve which is clearly visible in the photo above and in another drawing from the patent, reproduced below, where the position of the film rolls is also clearly visible.
There’s a brilliant finder on the top of the camera, but it’s only useful for deciding what goes in the center of the image; its edges are estimated because the viewfinder doesn’t cover the whole field. There’s also a bubble level, which is a must-have in a panorama because if it’s tilted in any direction, the image will distort a lot.
Kodak Panoram in use
Shooting today with Kodak Panoram 4D is very difficult as there is no longer any roll film that can replace the 103. The alternative is to load sheet film, but this has to be done in the dark and it’s not easy to fit and fix the film in the right place. Without the possibility of loading more than one plate at a time, it’s possible to take just one picture and go back to the darkroom hoping that everything went well and load another one.
An alternative would be to adapt the camera, using a mask that follows the curvature, to use 120 film, but this would mean reducing the height of the frame from approximately 9 cm to 6 cm, cutting out a lot of the scene and reducing it to just its central strip. What’s more, given the enormous size of the frame at around 30 cm, with 120 film you would only be able to take two and a half photos in its 850 mm. The ideal would be 220 film, which is twice as long as 120, but this is no longer manufactured.
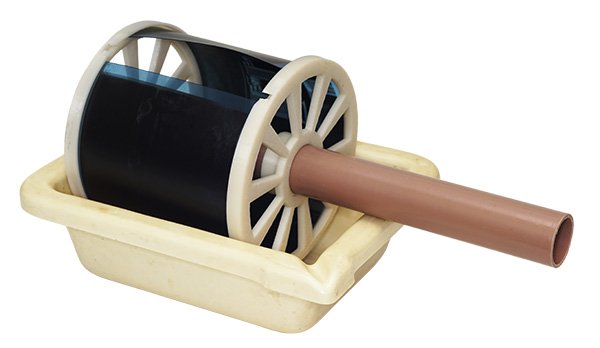
The alternative I tried and which worked was to put X-ray film simply taped at both ends. The good thing is that this can be done with red light in the darkroom. The bad thing is that this type of film has emulsion on both sides and is therefore very easy to scratch if it is developed in a tray. The solution I found was to produce the accessory in the photo above on a 3D printer. With it, I can place the baths in sequence in a tray and slowly rotate the film, which doesn’t touch or get touched at any point.
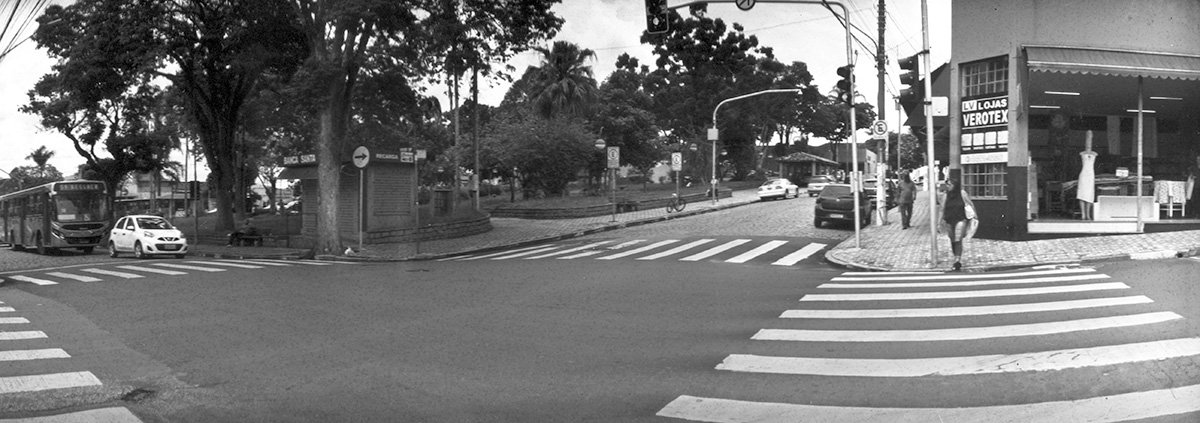
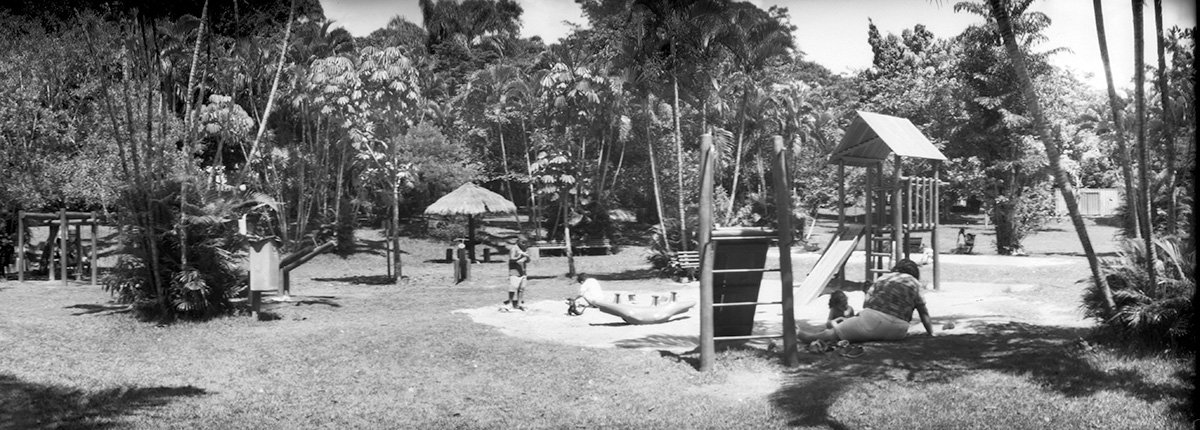
The photos below were taken with it using Fuji HR x-ray film exposed at ISO 100.
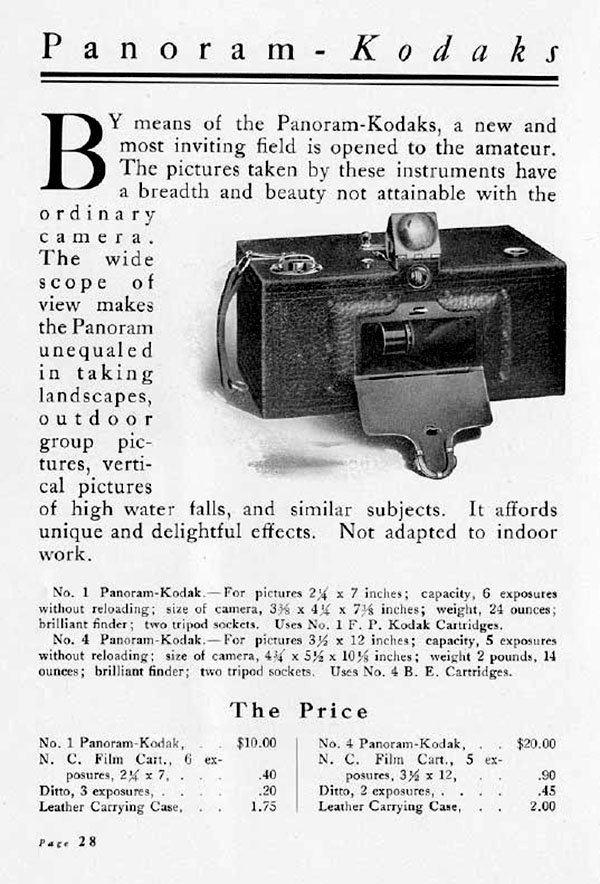
Below is an advertisement for the Panoram, which was offered in two versions, No. 1 for 2¼ x 7″ photos and No. 4 for 3½ x 12″. It’s interesting to note the remark: “Not adapted for indoor work”. Indeed, with the meniscus only offering f/11, with a shutter speed equivalent to something like 1/25s and the films of the time, only outdoors and preferably on clear days would it be possible to photograph.