Photographic development tanks, use and history
This article is a bit about practice and a bit about the history of the photographic development process for silver gelatin negatives in terms of the containers in which it takes place. The thing is, I use and research old equipment, so as well as talking a bit about transformations over time, I can also comment on its practicality from a current perspective.
Tanks for spirals
But I’m going to tell this story backwards, so you can stop when you think I’ve gone too far back in time.
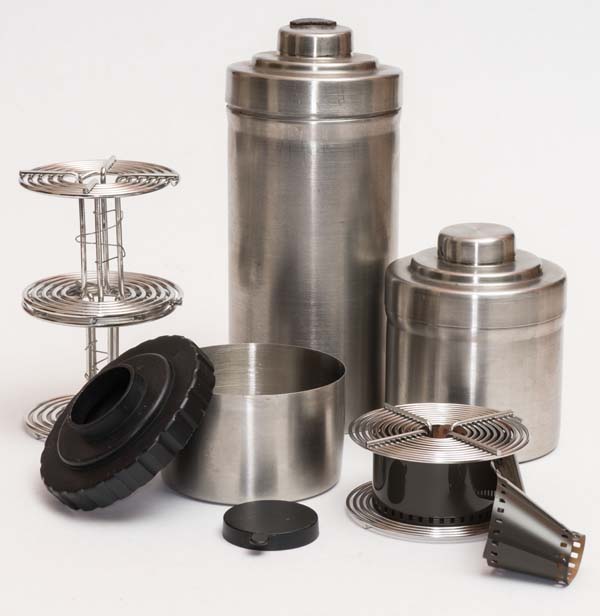
Photographic development has practically been reduced to a tank for 35 mm film. The one pictured above is a 250ml stainless steel tank with a spiral made of the same metal and a plastic lid. Many people struggle at first to get the film into the spiral and give up on this type of tank. But those who overcome this phase of rejection and get the hang of it usually never give it up. I consider this the ideal system. The metal is less porous and has far fewer surfaces to retain chemicals from one bath to the next. It’s easier to wash, I think it’s also easier to control the temperature and in general it uses less developer per film.
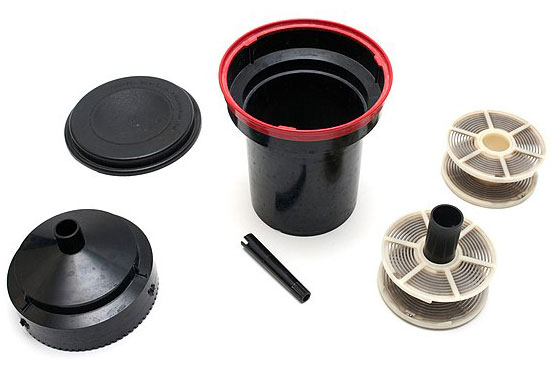
There are other plastic systems such as the famous Paterson (pictured below) or Jobo, in various versions. The Jobo even has an automatic mode for shaking the tank by turning it on its axis horizontally. They have the advantage that you can adjust the height of the spiral to reveal different shapes in the same tank. I’m a loyal user of steel tanks and don’t have any plastic ones. So here’s a photo from Wikimedia Commons of a Paterson tank just to give you an idea.
If you use steel ones, you need a variety of shapes because they are not adjustable. The older ones even had a stainless steel lid, as you can see in the photo below. It is more prone to leaks, but I put a strip of vinyl around it and that solves the problem well.
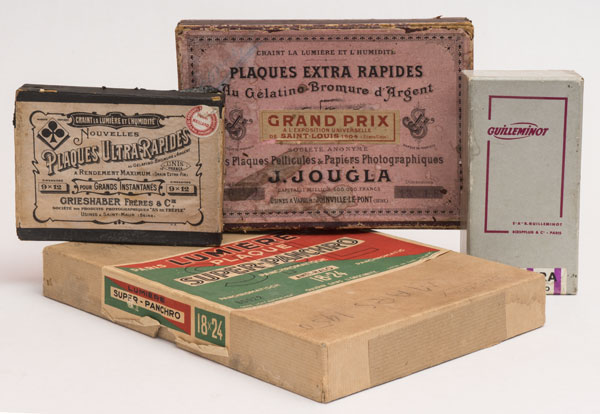
Bandages or film hanger
Today we still do large format photography, i.e. on flat films of ¼ sheet or more. Remembering that a full sheet is something like 8 x 10″ or 18 x 24 cm, a quarter sheet brings us to 4 x 5″ or 9 x 12cm. These are the ¼ formats in the American and European systems respectively.
There was a time when a significant part of product advertising photography was done on ¼ sheet film. 120 film, considered medium format, was more for moving subjects, such as fashion, for example, but still life photos, pack-shots of cosmetics, food and household appliances, cars, were overwhelmingly done on ¼ plates or even larger.
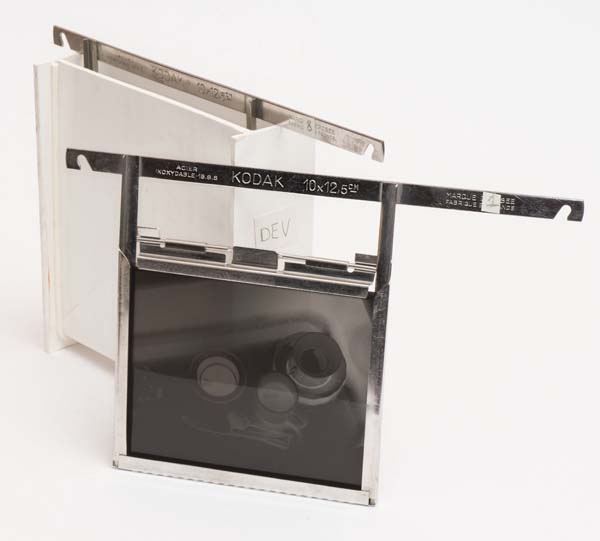
For developing flat films, the best system should be a film hanger, which is literally a “film hang”. It’s a stainless steel frame like the one shown in the photo above. This is a 10 x 12.5 cm (~4×5″) Kodak film hanger made of stainless steel. I still don’t understand why Kodak used the metric system to measure film cut using the imperial system. In any case, the photographer slides the film down the side channels and closes it by turning the flap at the top.
These film hangers came in steel or plastic tanks. The problem with using these tanks today is that they were sized for professional use. You can still find some, but they are usually for several liters of developer. For the amateur photographer, these quantities don’t make sense. The remedy I found was to make my own tanks out of 2 and 3 mm thick white PVC sheets. Using a heat blower and PVC solder, you can make a small tank like the one in the photo above. It only uses 400 ml of developer and allows you to develop two plates at once. I made a larger one for 5 plates (photo below) using 1 liter of developer. These quantities are more in line with the volume of plates I develop. Especially considering that I like to useone-shot developers such as Parodinal.
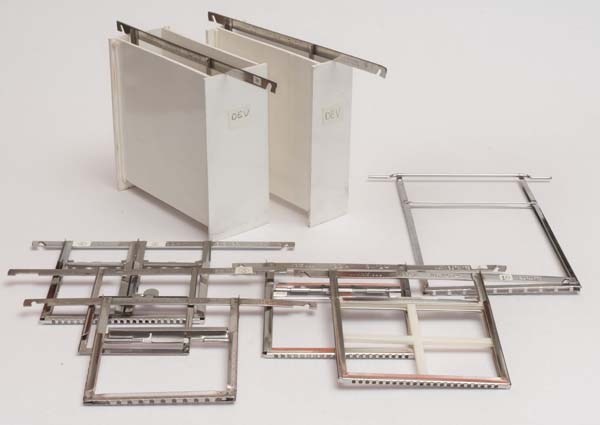
Film hangers are not difficult to find and are not expensive. Above are the formats 6.5 x 9 cm, 2¼ x 3¼”, 9 x 12 cm, 4 x 5″ and 13 x 18 cm. But as people tend to throw them away, they may become rare in a few years’ time.
Trays
For full sheets, in my case 18 x 24 cm, I don’t have film hangers or tanks. Again, the issue is the volume of developer needed, which I find prohibitive. It’s normal for me to make and develop a single plate, a portrait of someone who has come to visit me at home, for example, in which case I wouldn’t use a tank with 1 liter of developer.
Trays are ideal for these situations. I can develop an entire plate with just 250 ml of developer in an 18 x 24 cm tray. That’s exactly one 5 ml ampoule of Parodinal in 250 ml of water.
The trays are more reminiscent of developing paper in the final copy of a photograph. But be careful, there’s no point in using the same process with 3 trays and passing the film from one to the next. The ideal is to use just one tray and 3 beakers with the three baths. I leave the tray with water to soak the film’s gelatine for two minutes, it goes into this water in total darkness and then I drain and replace each of the three baths. I follow the audible signals of a timer designed for this purpose. Then I can turn on the light and wash. This way I don’t touch the wet film at any time. This is important to avoid scratching the emulsion. This way I don’t use a hardener and the films come out perfect and without any marks or stains.
Roll film trays?
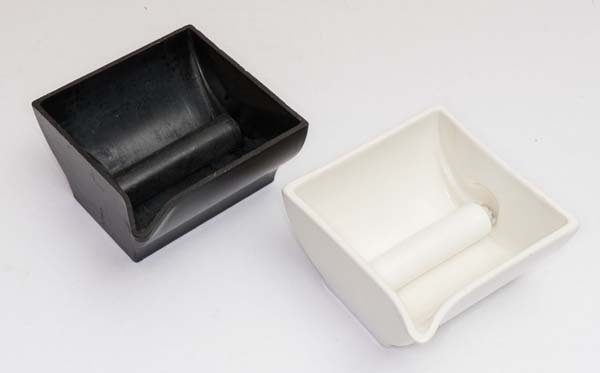
When roll film was invented in the last decade of the 19th century, trays were probably the dominant medium. As is usually the case, instead of immediately coming up with something completely different, the idea was to improve on the existing one. That’s how these “trays” like the one in the photo above came about. A cylinder of the same material, bakelite or china in these cases, enters through a groove in the side of the container and is locked at a certain height, without being able to come out vertically.
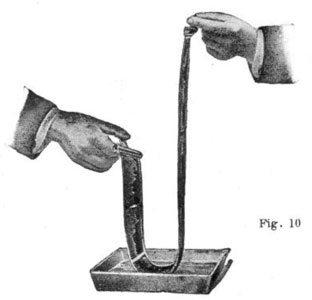
The photographer must then, using an alternating up-and-down movement of the hands, pass the film through the baths, taking care to leave the emulsion facing downwards, so as not to scratch the roller or the bottom of the container itself. In the photo above we can imagine the movement, but the tray shown doesn’t have the sophistication of the cylinder to keep the film always immersed in the bath.
I believe that this type of development only works with films that allow development under some kind of safety light. Orthochromatic films, for example, which can be developed under red or amber light.
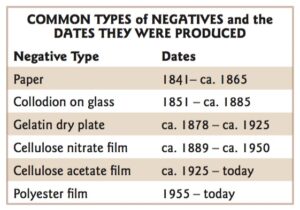
Here’s an interesting table with the dates of the main photographic negative processes. It was taken from a publication by María Fernanda Valverde Valdés, entitled Photographic negatives : nature and evolution of processes. It shows that it was only a decade between the invention of the silver gelatine process and the first flexible cellulose nitrate films.
Old spirals
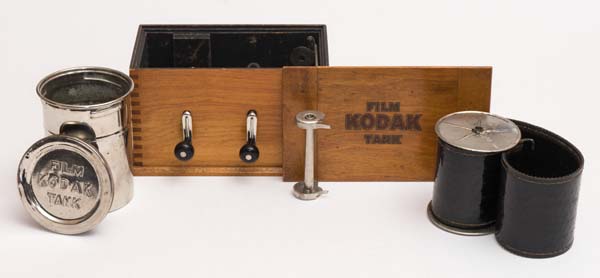
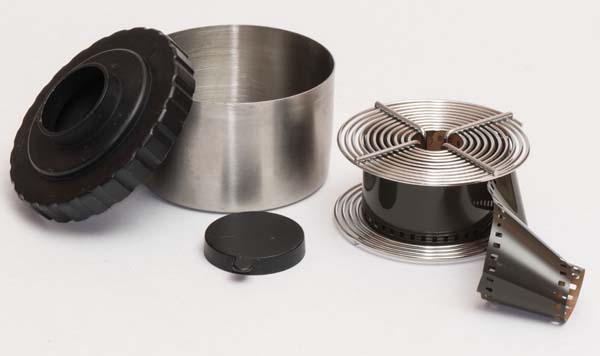
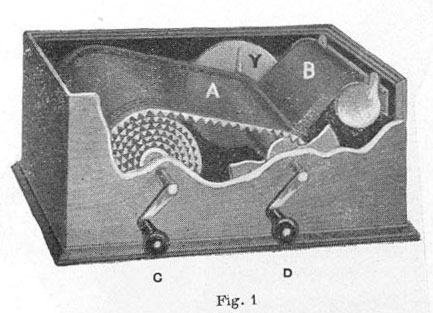
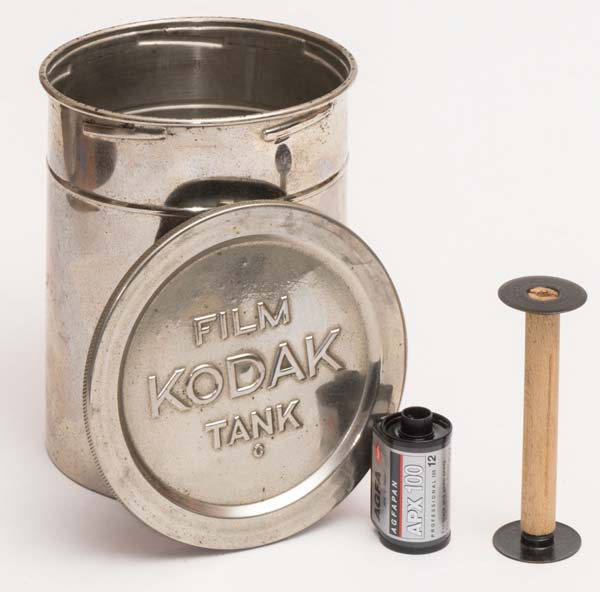
Despite the trays with rollers, the geometry of the spiral was soon identified as being ideal for giving the developer access to the surface of the emulsion while keeping the film in a more contained volume. The idea is nothing more than a fluffier roll. This Kodak tank, for 120 film, was not yet like the steel or plastic spirals. The elegant wooden box allowed the film and a strip of acetate (or something similar) to be wound together at the edges of which there was a rubber toothed strip (illustration below). This toothed strip ensured a distance between the film, on the emulsion side, and the back of the acetate on the front lap, thus giving access to the developer.
Once wound together, the spiral went into a beautiful cylindrical developing tank made of nickel-plated metal. The system was successful for a while and similar magazines and tanks were made for various formats.
Some of them would be classified as “large format” today. This is the case of the one in the photo above, which was probably used for formats such as the one that allowed “cabinet” size photos, something like 10 x 14 cm.
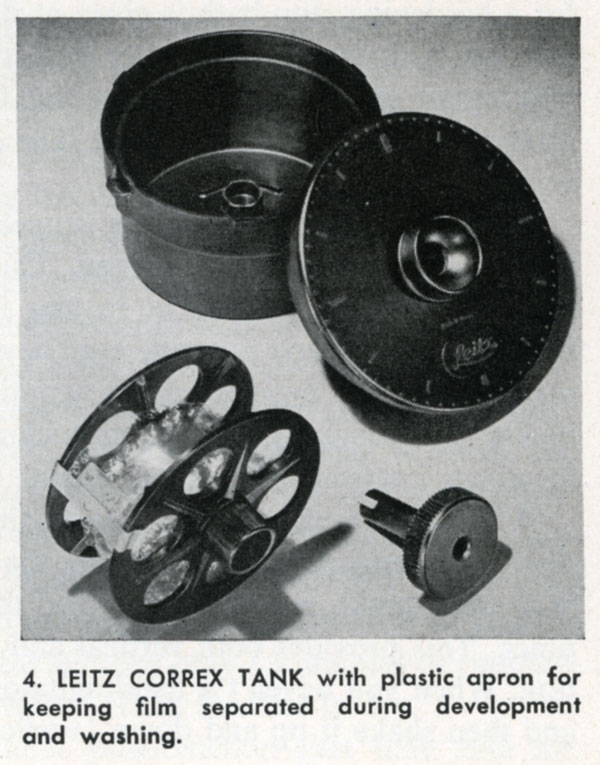
Photo of the Leica Manual Morgan & Lester (1951)
The same principle was later used by Leitz, the manufacturer of the legendary Leicas. The tank itself already resembles that of today’s spirals, due to the dimensions of the film. But the idea of wrapping the film and a plastic base together was used again. In the Kodak tank, a strip of rubber with teeth is sewn around the edges of the plastic base.
In the case of the Leitz Correx Tank, the plastic tape itself is deformed in such a way as to create bulges at its edges to keep the emulsion free from the contact of the innermost layer on the film roll. This system was very well received, re-copied and even created barriers to the introduction of conventional stainless steel or plastic spirals, which only came to dominate in the 1950s (information from friend, photographer and researcher Martin Carone dos Santos). The incredible thing is that the quality of the materials used was such that photographers still use Leitz Correx today (Martin is one of them). While today’s plastics dry out in a few years and become brittle, the bakelite tank and transparent tape of the Correx continue to serve and resist ageing.
Daylight” spirals
It seems that the issue of loading the spiral in the dark was a concern for some time. Some systems were proposed so that the film cartridge was placed inside a container and from there it was transported to the spiral in broad daylight.
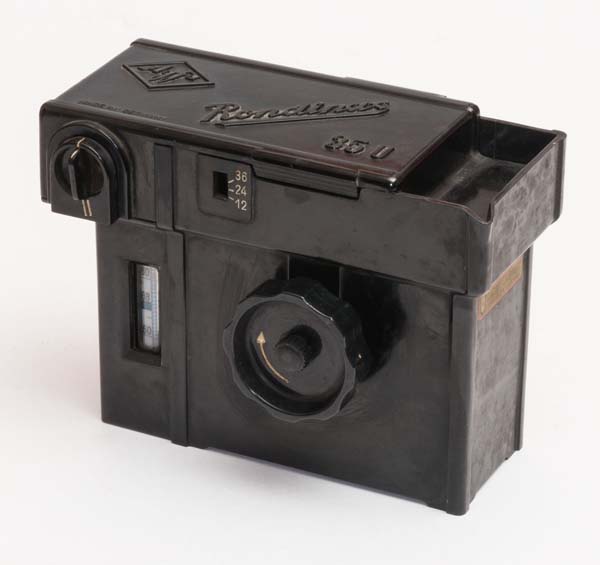
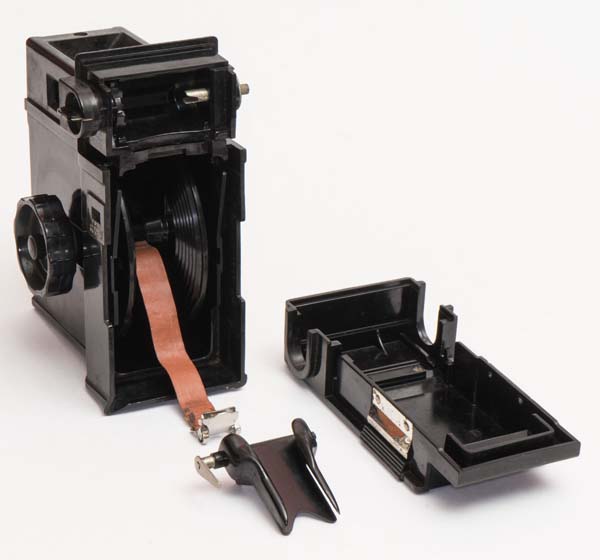
This is the case with this beautiful piece of bakelite from Agfa, the Rondinax. The 35 mm film cartridge itself is placed inside it, then it is capped, with the end of the film already attached, and then, by turning the large knob shown in the photo, the film is pulled into the spiral. In this way, film can be developed without the need for a darkroom.
From a toolmaking point of view, this is a very complex part. A real feat of construction at a time when people drew on drawing boards without the aid of AutoCad and computers running lathes and milling machines.
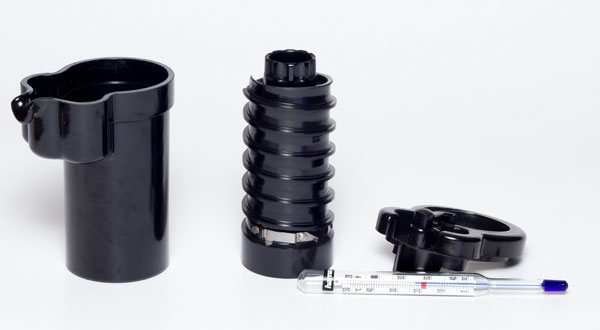
Another bakelite piece, this Minox developing tank follows the same concept and can develop film in the clear. Another point of flexibility for this camera, a favorite of Cold War secret agents in the 60s.
Glass plates in batches
Although the paper negatives invented by Henry Fox Talbot, the first successful negative/positive process, were historically very important and were embraced with fervor by famous photographers, in the early days of silver gelatine emulsions, glass was the medium of choice for the vast majority. Developing in trays was the most obvious way to handle an emulsified glass plate. However, with the need for greater production, alternatives for batch processing soon emerged.
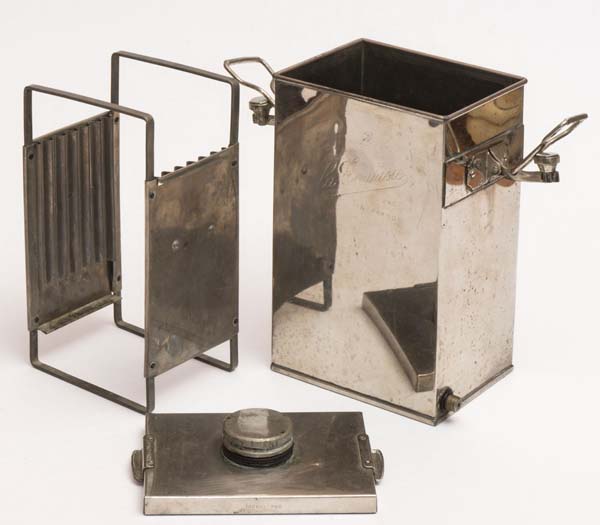
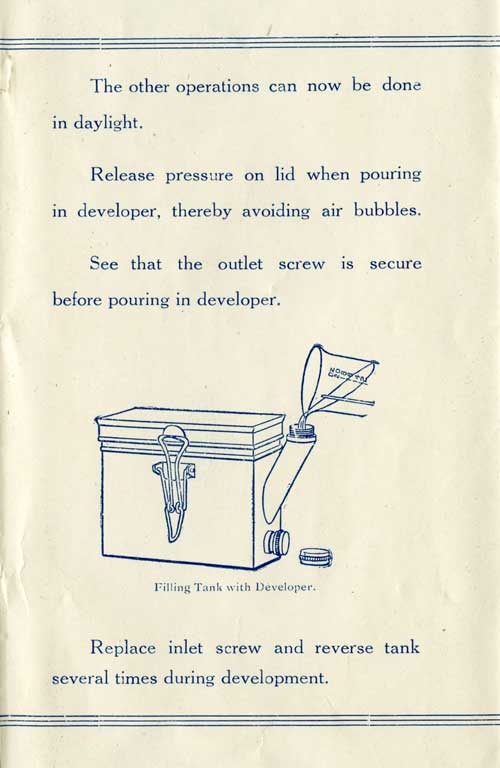
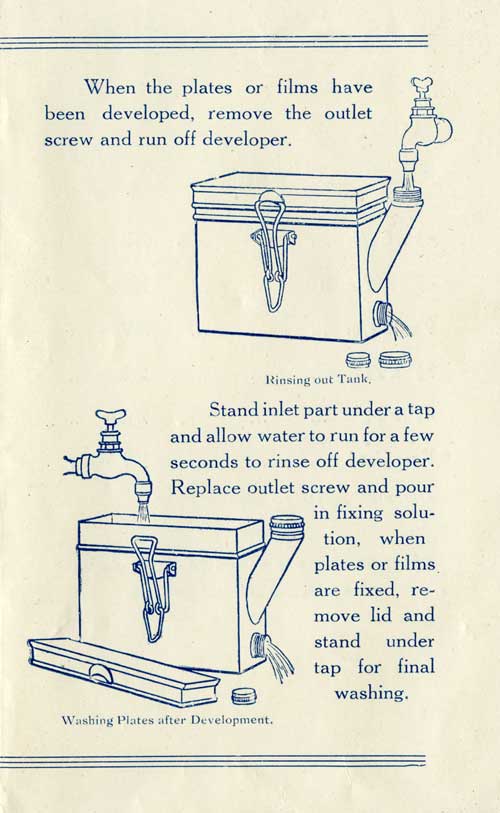
This is the case with the device above. Made of metal, probably brass, and coated with a layer of nickel or equivalent, this tank allows 6 glass plates measuring 9 x 12 cm to be developed. To load it, you need either no light or a safety light, depending on the emulsion in use. But once it’s covered, processing is done with ambient light. The upper lid is used to pour the baths and the lower corner has a drain valve. The drain is very slow, but it’s also true that the development baths were relatively long, so that the time taken to go from one bath to another didn’t result in uneven processing.
In the first quarter of the 20th century, glass plates, which we call ” dry plates“, were widely used by professionals and amateurs alike. Detective cameras like the Klito or the Midg, for example, carried 12 of these plates and were very important in the de-professionalization of photography. There were many manufacturers of these plates around the world. There wasn’t the concentration that was later seen in the film industry, where a few names dominated the market. Developing tanks, especially those that could develop with ambient light, followed the trend and were an obligatory part of the amateur photographer’s equipment.
Large-scale production
The circulation of images in the second half of the 19th and early 20th centuries, even with photo-mechanical printing processes such as off-set, took place on a large scale using purely photographic supports. This was the case, for example, with the very popular 3D glass transparencies like the ones in the photos below. Curiosities such as monuments, cities, distant places, animals, other cultures and peoples, were distributed on glass plates in formats usually 6 x 13 cm (like the ones in the photo below) or 4 x 9 cm. They could be seen in small viewfinders or even in floor models for public places where you had to put a coin down to see a certain number of images.
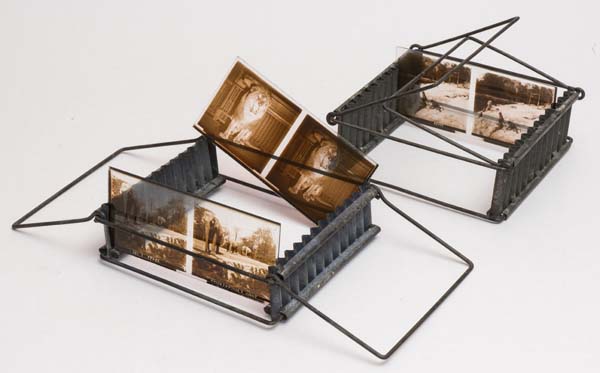
For these productions, already on an industrial scale, baskets like the one in the photo above were handled in large tanks capable of processing several sets at the same time. In this example they are photos of a series of animals in zoos.
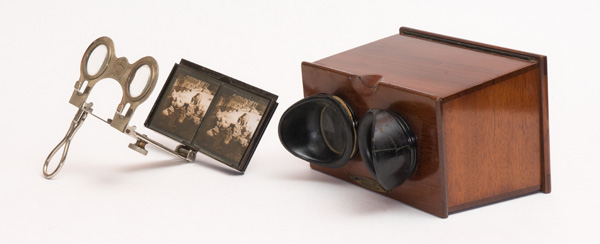
Portable viewfinders for these glass transparencies, like the ones shown above, made for viewing images in three dimensions, went beyond the world of the photographer and entered the world of curiosities and collectibles. Hence the need for large-scale production in industrial development laboratories.
Transition to flexible film
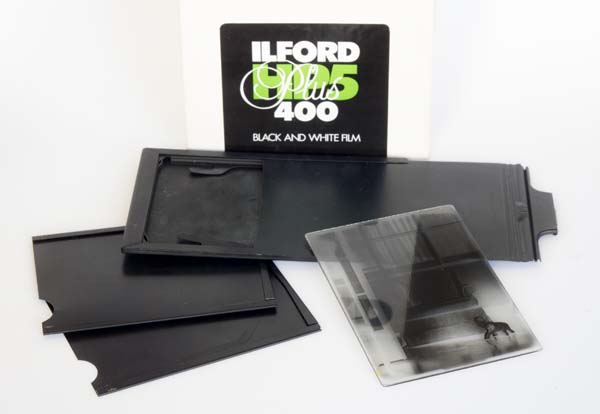
There was a time when glass plates coexisted with flexible films. This was especially true between the two World Wars. Cameras had chassis that accepted glass plates, 1mm thick, but they could also be loaded with flexible film with the help of an insert.
Above is a chassis of this type in the 6.5 x 9 cm format. The glass plate can go directly into it or, with the inserts on the left, you can load film plates in the same format.
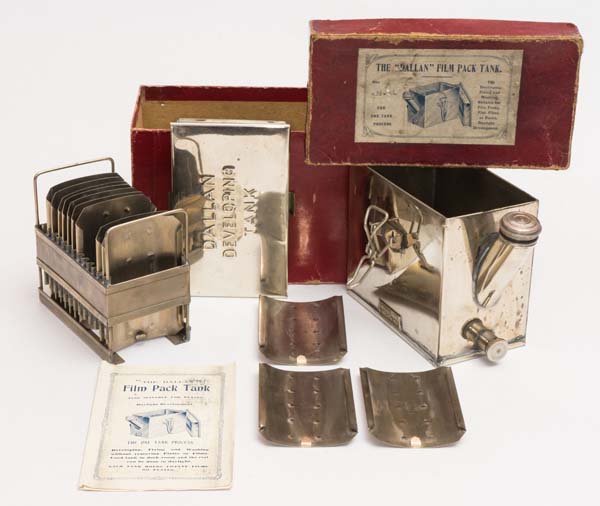
Development tanks followed the same trend towards hybridity. Above is a nickel-plated metal tank called “Dallan, film pack tank”. It was donated by David Glat, from the Museu do Brinquedo Popular, so thanks for that. The glass plates can go directly into the rack, as in the 9 x 12 tank above, or, with the help of the curved inserts, you can also load flexible films.
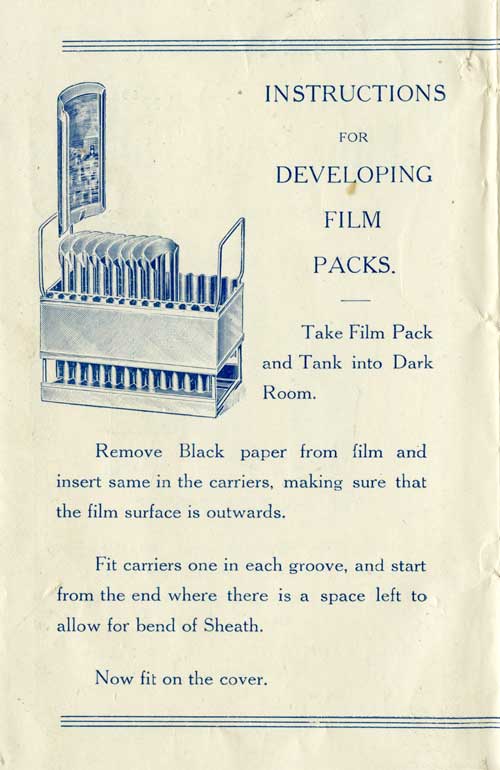
Film packs were interesting alternatives to using film in sheets, but with the possibility of carrying several in a single pack. The individual sheets of flexible film were stacked with strips of paper attached to one edge. Each time a photo was exposed, the photographer would pull the strip of paper that was left out and it would be slid to the bottom of the stack, leaving a new plate in position to be exposed.
The system was abandoned for negatives in favor of roll film or single plates loaded into chassis one by one. But the film pack still survives in Polaroid-type direct positive cameras.
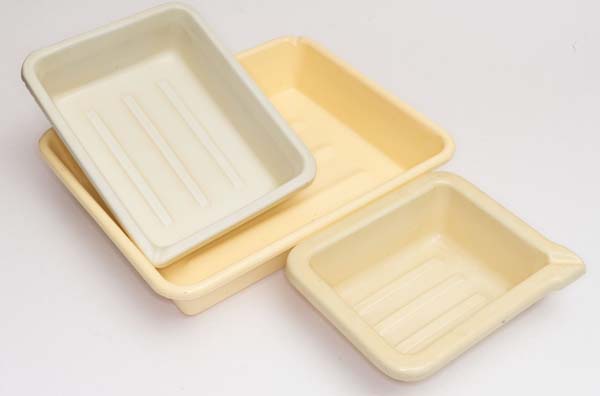
At first it was the trays
This is undoubtedly the longest-lasting analog silver gelatin emulsion development system. It was the first and is still used today. The special thing about a tray for it to be considered photographic is that the bottom cannot be smooth. If it is, the film or paper will tend to stick to it and it will be difficult to handle. Trays for use in photography, which are becoming hard to find today, were usually made from some plastic material by vacuum forming, where a sheet of plastic is heated and when it softens it is sucked into a mold (hence the name).
The second characteristic of a photo tray is that it has a spout in one of the corners to help pour the bath out of it. The third is that it should be of a size compatible with the negatives or positives that will be developed in it. Generally one to two centimeters larger in each dimension. Kitchen pans, although very similar, generally don’t have these characteristics.
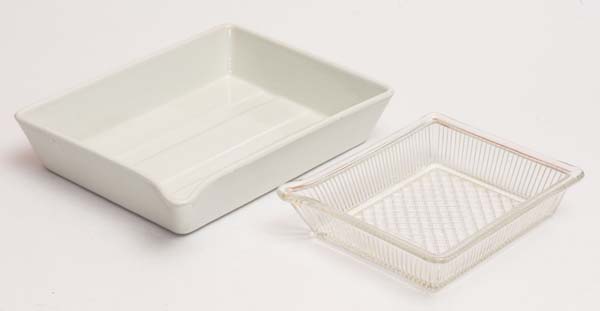
But photography has been around since long before plastics. In the beginning, the trays were made of porcelain or glass like the ones in the photo above. I found some of these at the Bièvres fair. It’s very difficult to date a piece like this. Some are well formed and you can see a more industrialized process. This suggests something more recent. But the dishes in trays and developer accessories probably date back to before bakelite (invented in 1907). Bakelite replaced a lot of things in photography and then came other plastics. There must have been a transition phase, but I believe that by the 1920s the use of crockery was rarer. But of course this is pure speculation.
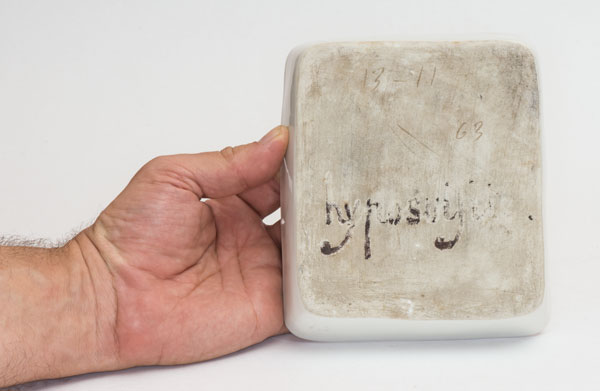
In other cases, such as the one in the photo below, we notice an irregularity and simplicity that suggests a piece made entirely by hand. Perhaps it’s older.
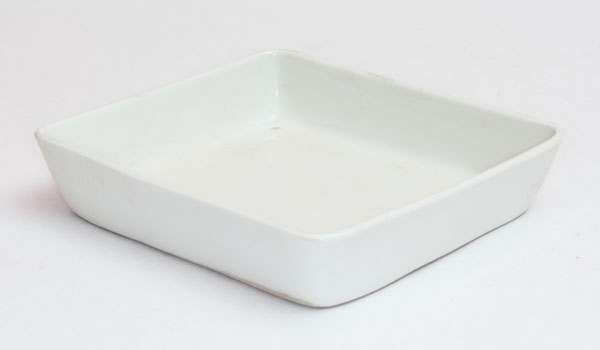
As for its use in photography, after all, it could have been just any old tray, just as today many people use baking tins, which could have been a point of doubt. But fortunately, its former owner, probably to avoid contamination between baths, wrote on the back of the tray “hyposulfite”, and this leaves no doubt that this is a very old fixer tray. A piece of photographic archaeology.
I still use them today. The advantage is that they have a large amount of material and this offers a high thermal capacity, i.e. once balanced with the developer at 20ºC they help maintain this temperature for longer than a plastic tray, for example. But even without considering this more technical issue (sorry), it’s a great pleasure to handle these historic pieces and think that despite their age they still work.