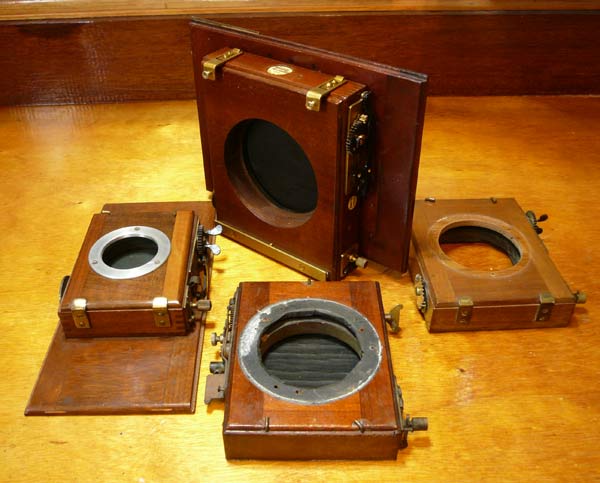
Many old large format lenses, which are very interesting to use, have no built in shutter. They are called lenses in barrel. For a long time the most popular shutter used with them, normally in front of the lens, was the roller-blind type. The system of having a light proof cloth with a window that passes in front of the lens to expose the film for a fraction of a second was created around 1862 and remained in production until the 1970’s. Thornton-Pickard, an English firm, was probably the best known roller-blind shutter producer ever. They patented the T-P shutter in 1886 and almost all brands that followed picked the basic idea from that pioneering design. There are many shutters of that kind that you can easily find auctions sites or antique shows and flea markets in general. They are not expensive at all. The problem with them is that the cloth is normally dry, cracked, torn or simply not present. While browsing in web forums for tips on how to close pinholes in bellows, I grabbed one idea that made me thing of an alternative way to make new shutter cloth. I tried and after some attempts it finally worked out. I am now using one that I mounted in a Thorton-Pickard shutter for more than 8 years and it seem it will remain usable for quite a while. That is what I documented and described in its basic steps in this page. I believe it can be a solution to fix many old shutter out there. If you want to know more about shutters in general I recommend Ernest Purdum’ s article in the Large Format Photography web site.
To try out yourself refurbishing an old roller-blind shutter by making and replacing a new curtain, the step by step that worked for me went like this…
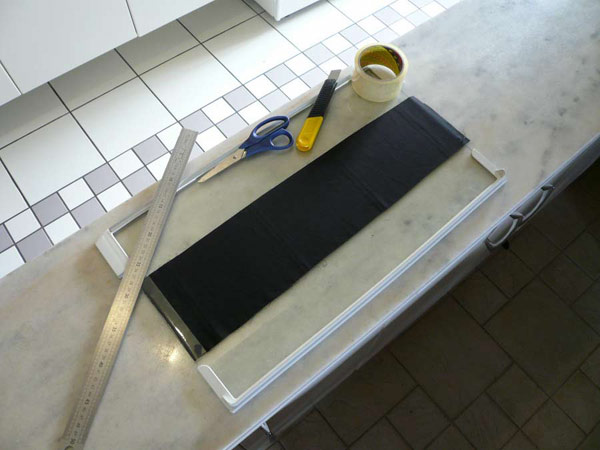
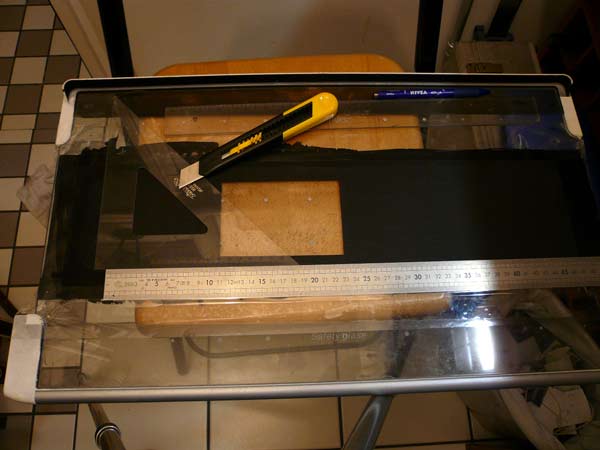
Start by cutting a piece of black fabric a bit oversized in regards to the final curtain. The fabric should obviously be thin, flexible, uniform and yet as light tight as possible. I bought sheer 100% polyester, one of the cheapest alternatives in store. Using adhesive tape, attach it flat over a glass plate. Do not allow it to be loose but don’t stretch it either. The glass is useful to check later on for pinholes by back lighting it.
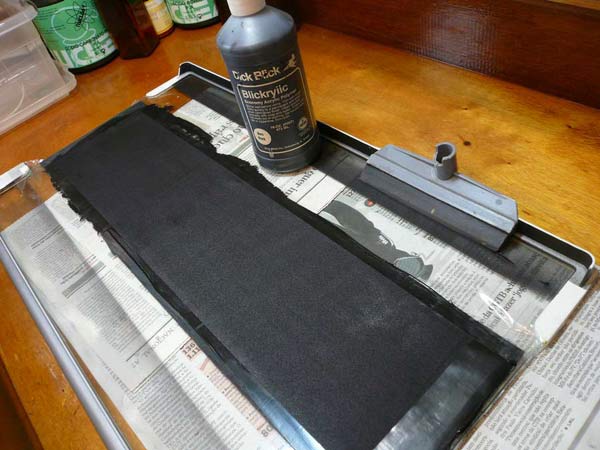
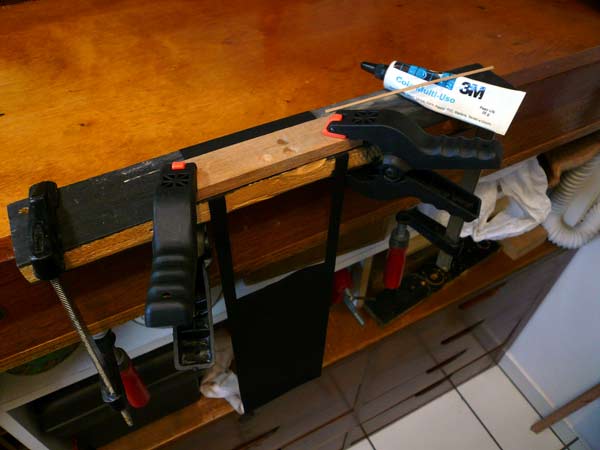
Here comes the crucial trick: using acrylic black ink it is possible to make the cloth light proof and yet flexible enough to be rolled inside the shutter. A thin layer of acrylic ink is flexible like rubber, not cracking, and thick enough to block light from passing by its large molecules mesh. The fabric is really a sort of ideal support due to the fibers that will microscopically intermesh with the polymer. In order to apply it, a rubber rod is just perfect. Start with a generous quantity of ink in one side of the patch and run it to the other side using the rod. Do it quickly and without pressure.
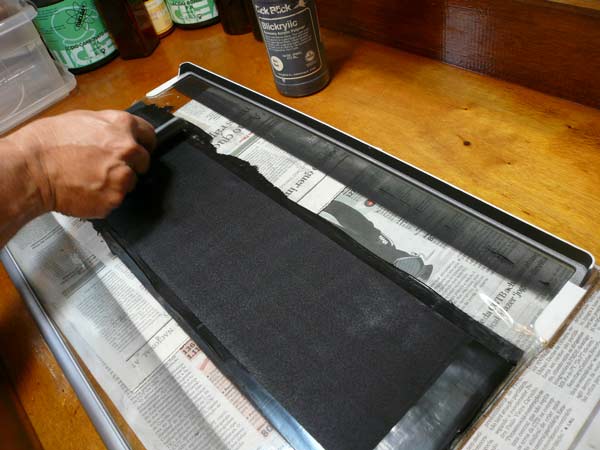
The ink should not show up on the other side of the fabric. By the way, I believe that many brands of ink will do, but be aware that the ink’s viscosity has to be quite high. I did not try with acrylic in tubes but this one in the picture, although in a bottle, is thick as white glue for wood. Allow it dry and check how much light is still passing by. You should see quite a number of holes. Apply a second layer and maybe a third always allowing time to dry.
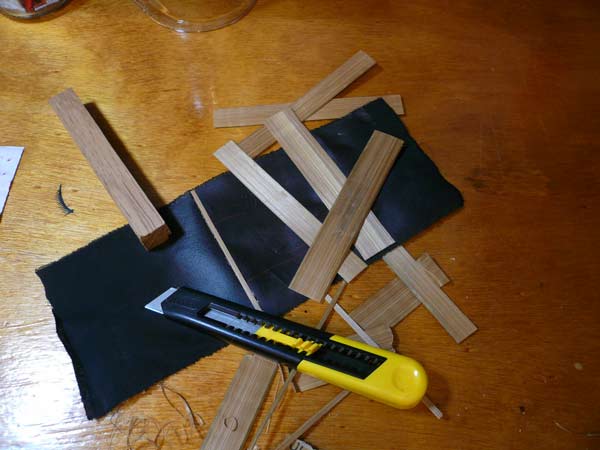
Now you have to prepare two bamboo sticks. Bamboo can be made very thin and yet hold good resistance to structure the shutter window. Two sticks having 2 to 3 mm in one dimension and the thinest you can on the other will do perfectly. The one in the picture I glued to the fabric just to test it. The real one, I decided to cut the window in the cloth, before attaching the stick.
I had the chance to have the old curtain and used it to easy my life with measurements. For those without any reference I advice to let some extra length of cloth to be cut later.In cutting the window you will realize that the ink made the fabric very similar to the normal rubberized shutter cloths we find from professional sources. If you were careful no keep the ink only on one side of the cloth you will see that the chance of having the curtain sticking to itself while rolled, is quite low because one side does not “combine” with the other.
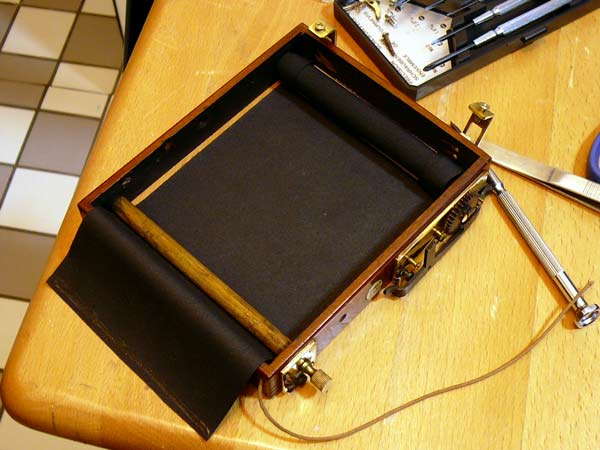
Time to mount it inside the shutter. It took me some time to figure out how. There is only one relative position that makes the shutter cock and fire properly. The way that worked for me was to assemble it in the cocked position with the spring loose and only at the end I added pressure by spinning the inner part of the axis but not rolling the curtain. You must be patient. It might take time to figure the sequence for assembling and that dependes on your specific shutter model. Do not discharge your anxiety and frustration over this delicate mechanism: it will not fix itself by fear of your anger
Well, I hope that was useful for you. I would never try this for a 35mm camera but for a reasonably sized shutter this is something that still fits into the home made industry standards.
Thanks for sharing ! Before I found your site I doveloped a way to restore old wooden shutters and restored allready about ten, three with a new curtain. It is very similar to your way. Your idea to work on glass is brilliant – to be able to check for pinholes. I want use it.
After some experiments I use a mixture of black acrylic paint for artists and black natural latex, about 50% each. Alone no of this two ingredients works well. Together you can make the solution more stiff or more soft depending on the mix.
You have to work quickly with this mixture, it dryes in some minutes.
Ingredients:
https://www.flickr.com/photos/145497036@N02/albums/72157719584650965
Work:
https://www.flickr.com/photos/145497036@N02/albums/72157716241819886
Here I used “gomma liquida” – it works, but the mixture above is better.
Hello Xandr, thanks for your comments. I am considering next time to try Tyvek and liquid rubber (gomma liquida), as an opacifying agent. In case it works, I think I will allow me to fix smaller shutters. I have an Exakta for 127 film and will try with this one. There is even black Tyvek. I hope a very thin layer of rubber will be enough to make it lightproof. I will post here the results.
Thanks for sharing this post with us. It’s really a nice and helpful piece of info about roller blind shutter. I have really enjoyed browsing your blog post. I’m happy that you shared this helpful information with us. Thanks for sharing this information.
Hi
I’ve also been trying to replace the shutter in my Thornton Pickard units.I’ve tried lots of different types of fabric finally settling on using black silk.strong and works every time and yes two layers of blackboard paint then scrapped to a fine even layer,the only problem is I’ve tried to rebuild it exactly like the original using the two metal wires located at the aperture and also the silk ribbon linking both silk panels together over the aperture and it has a problem, it always snaps at this location.(both the original and my version)You haven’t said how you have overcome this problem. I’ve seen so many of these shutters and all eventually snap in the same place telling me it’s a design problem. Ideally if the shutter box was bigger you could allow for a reinforced shutter but as it is it’s not perfect and prone to snapping,any help would be grateful on this as I’m still trying to improve the ribbon.The rest of the units work perfectly.
Hello, If I understood you correctly, the problem is that the joint of ribbon and shutter cloth is tearing apart. Well, what I used to restore some of those shutters was a unique piece of cloth. No ribbons and no joints. I noticed that after applying the acrylic paint the tissue becomes reasonably strengthened although flexible. Then I just cut the edges and a window on it using a blade. It does not shred on its borders. Proceeding this way it becomes a unique piece from one spool to the other. I do not use a wire either. I was afraid of not being able to sew it to the fabric or any other physical attachment. Instead, I used a very thin piece of bamboo in order to keep the window border straight. Bamboo is nice because it can be cut and sandpapered to have a flat side that glues very well to fabric while being very thin on its other dimension. As you see my approach was not about using techniques/materials from old times and doing a real restoration. I just wanted to put them back to work. Hope this helps.
I have a graflex I need to do this with. How well did it all work out?
Hello, I used it for some Thornton Pickard shutters, the type you see in the picture. They have only one window and it worked very well. I have a Graflex RB and the shutter has several windows with different sizes so it is quite long. If that is your case I think you should test before hand whether the final thickness of your cloth will be a problem when it is spooled. Will there be enough room for it? I would also look for something thinner than bamboo to reinforce the edges or try not using any reinforcement. But the combination of cloth and acrylic paint in itself, it becomes light proof and flexible very easily. It is just a matter of 2 or 3 layers of ink. Good luck and thanks for stopping by.