Salted paper positive printing | Henry Fox Talbot
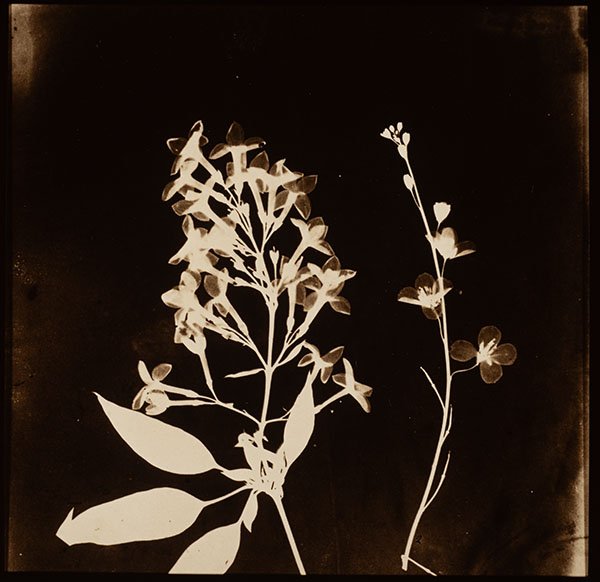
Salted paper print by Henri Fox Talbot
The Metropolitan Museum of Art
–
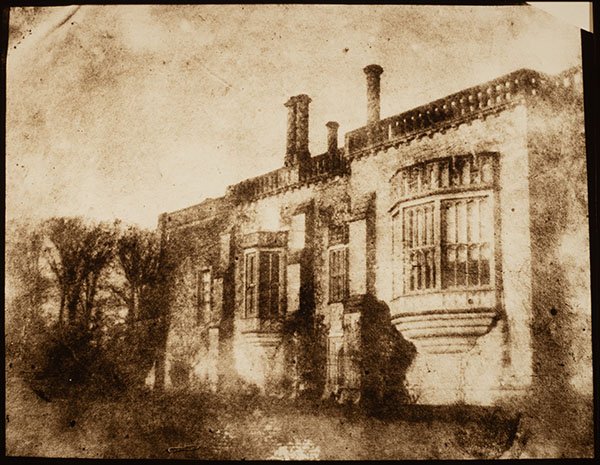
When the Englishman Henry Fox Talbot learned that on January 7, 1839, in Paris, François Arago announced at the Academy of Sciences that photography had been invented by Louis Daguerre, he was surprised and certainly regretted not having paid more attention to publicizing his own research in the field. Especially as he learned that the French government was considering a large pension for Daguerre so that the invention could be donated and made public. Talbot was very rich, probably more so than the money, what he realized was that Daguerre would get the glory for something that, in his view, he had already achieved in 1835, four years earlier.
In fact, at this point, he was well on his way, on the path that would be the future of photography, but there were still a few steps to go. What he had in January 1839 was a process for printing, by contact, on what became known as salted paper. Even so, he still didn’t have an efficient means of fixing the image, he still couldn’t “wash” the light-sensitive silver salts that hadn’t been “used”. As a result, when the paper was removed from the contact press, the light parts began to darken until the paper was a very dark brown and the image itself gone.
Thanks to the announcement made in Paris, another Englishman, John Herschel, decided to study the subject and as he had known since 1819 that sodium thiosulphate dissolves silver salts, he gave this precious information to Talbot and the latter passed it on to his French “competitors”. So, finally, in February 1839, the problem of how to fix and make permanent images made with silver salts on any support was solved once and for all.
Important distinction
In negative/positive photographic processes, in which the negative is printed by contact, the need for light changes dramatically from one situation to another. The image produced by the lens when obtaining the negative, i.e. the image projected onto the back of the camera, will always be hundreds or thousands of times weaker than the light falling on a contact press.
While in the camera the light is captured by the lens through an aperture of a few millimeters or at most centimeters and distributed over a much larger area, in the contact the press is placed directly under daylight and often direct sunlight.
That’s why the process of obtaining the negative took longer to be found. Apart from the fixative issue mentioned above, a much higher sensitivity had to be sought because the light is much weaker in the camera. To compensate for this “weakness”, a chemical “reinforcement” is given, the exposed image is only latent, invisible, and needs a developer to trigger the process of forming the grains of metallic silver that make the dark tones in the image.
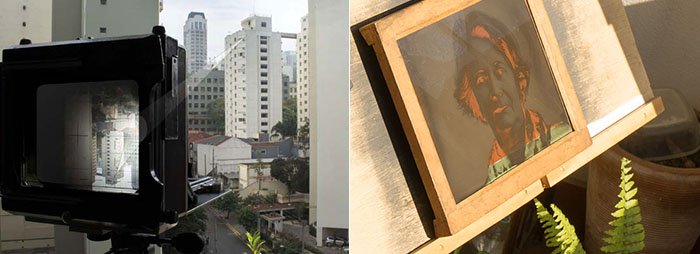
For the first processes to obtain the positive, i.e. printing the negative, research led to processes that required a lot of light in contact printing, but on the other hand, did not require the extra step of developing, which was not even imagined. After a few minutes or seconds under the sun, one could already see the image printed on the paper. This is the case with salted paper and that’s why the presses have a hinged back, so you can inspect the progress of the exposure without leaving the register.
It wasn’t until 1874 that the first latent image papers appeared commercially, i.e. those that needed much less light but had to be developed. These new papers, based on gelatine and silver bromide, were called developing-out-papers (DOP), meaning that the image is not visible immediately after exposure. It was called this to differentiate it from printing-out-papers (POP), such as salted paper, which already show the image as soon as they are exposed.
The salted paper process
There have been many variations in additives and ways of handling salted paper and reagents. Here, as the perspective is historical, only the essentials will be covered.
1- Preparing the paper
You need to use good quality paper that is free from impurities. Watercolor papers are ideal. It is very advisable to wash the paper in filtered or even demineralized water. This can be done by immersing it in a tray, rocking it and changing the water a few times according to the number of sheets.
2- Salting the paper
Only one side of the paper receives a solution of sodium chloride, or table salt. This can be done in various ways, but the most traditional is to let the paper float in a tray of this solution for a minute. It is then hung up to dry completely.
3- Making it light sensitive
The paper should be bathed in a solution of silver nitrate. Only the side that has received the salt. This can again be done by floating the paper and laying it out to dry. This bath needs to be done with a very low intensity light. A darkroom safety light is more than enough. The drying period, being longer, should ideally be done in total darkness.
4- Exposure
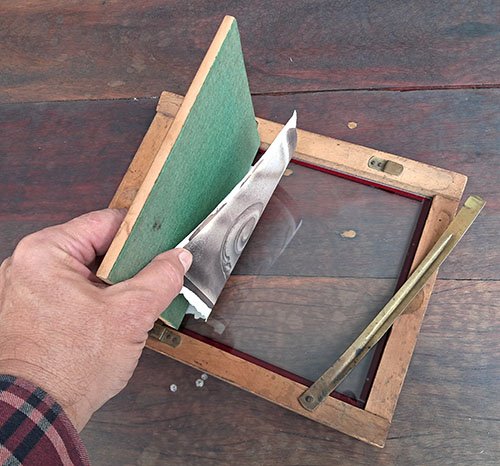
Now the dried paper can be exposed with a negative on top of it and both pressed in a contact printing device. Nowadays, it can be on an ultraviolet light table. But obviously, in the early days of photography, daylight was used. You don’t need direct sunlight, a clear day is enough. As for the exposure time, you need to do tests. But remember that with a suitable press, you can inspect the appearance of the image. When you open a part of the press, it’s a good idea to act quickly and stay out of the light. A few minutes is usually enough and the ideal is when it seems to have darkened a little too much, as washing will lighten the overall density to the correct level.
5- Washing
The next step is to return to the laboratory with the safety light on again and wash the paper with clean water. The aim is to remove the silver nitrate that has not combined with the sodium chloride to form silver chloride.
6- Fixing
Next we move on to a solution of sodium thiosulphate. The aim now is to remove the silver chloride that has formed but has not been exposed to light, this will prevent the light parts of the image from darkening when the light is switched on.
7- Final wash
At this point you can turn on the light and give the final copy a good wash. The old manuals talk a lot about “running water”, but they are from a time when there wasn’t much awareness of sustainability issues. That’s why you should update the procedure and wash by changing the water in the tray several times instead of leaving the tap running. Interspersing changes with rocking the tray produces a very efficient wash.
8- Drying
You can then hang it up or dry it with a thermal blower at a lukewarm temperature. The advantage of blow-drying is that, as well as being quick, you can work the paper so that it doesn’t bend too much. In the end, pressing it between two sheets of blotting paper will ensure a flatter sheet.
The question that emerges
Why did Fox Talbot (and the whole world of photography for another 50 years) use a developing process (DOP) for the negative, but continue to use a direct darkening printing process (POP) for the positive? If both were paper-based and the former was much more sensitive, why not use the more sensitive one and get faster copies?
There are three reasons:
1- The paper for the negative uses silver iodide and this makes it not only more sensitive, but much more sensitive to the point that using it in the contact printer, for a few moments only in daylight, it darkens completely almost immediately when it enters the developer. Positive paper uses silver chloride, which is thousands of times slower and therefore allows better control of exposure.
2- With DOP paper, which needs developing, the photographer cannot see the evolution of the exposure. They have to estimate, as they do in the camera, and only afterwards will be known whether the estimated time was good or bad. Again, a question of control. With POPs that darken as they receive light, this monitoring can be done efficiently.
3-Aesthetics also play a role in this decision. The salted paper has a warm, chocolate brown tone that was much more pleasing than the cold tones you got from the negatives.
In short: silver iodide is much more sensitive, but needs a developer, silver chloride is much less sensitive, but darkens only by the action of light. Each has its virtues for the negative and positive processes respectively.
Conclusion
This is the general outline of Henri Fox Talbot’s salted paper process. If, in addition to the historical curiosity of just knowing what it was like, you want to delve deeper and even make salted paper prints, I highly recommend The Albumen & Salted Paper Book by James M. Reilly.
DIY projects, in case you want to experiment the salted paper or any other print-out process:
1) A “Solar UV Exposimeter“. Sunlight is very rich and excellent for these artisanal print-out processes, but the only problem is that it varies during the day and it’s difficult to maintain consistency. With this exposure meter you regulate the “dose” of light and it beeps when it’s time to stop the exposure.
2) A Hinged contact printer

If you are on the Photographic Processes theme circuit:
In the next room, you will learn about the first photographic process to achieve great success: the daguerreotype. It is a direct positive process on a copper plate coated with silver. Produced from the image in the camera obscura.