Homemaded contact printer
A photography contact printer is very useful in any laboratory. It is useful for large-format photography, when enlagers no longer match the size of negatives and are also useful for processes using ultraviolet (UV) light, either sun or artificial. This is the case of Van Dyke Brown, Gum Dichromate, Cyanotype, Salty Paper, Platinum / Palladium and others that can be researched or even invented.
In this article you will see the design of one of these printers. Watch the video and see how it is, how it works, and then follow the step by step to build yours. If you do not have any skill for woodworks, this tutorial may still be useful for you to explain the project to a professional who will be able to execute it for you.

The starting point is the glass, because it will determine the size of the press. I used, in this case, a glass from a desk scanner. I thought it was a good idea because I imagine the manufacturer has specified a glass less suitable for scratching. Also the size, a bit larger than A4, is quite convenient. Finally, it already has the edges stoned. In a scrap, an old scanner can be found for almost nothing. Obviously, the glass can also be bought cut to size in a hardware store.
The first step is to cut four pieces of wood 2×2 cm that surround the glass as shown in the picture above.
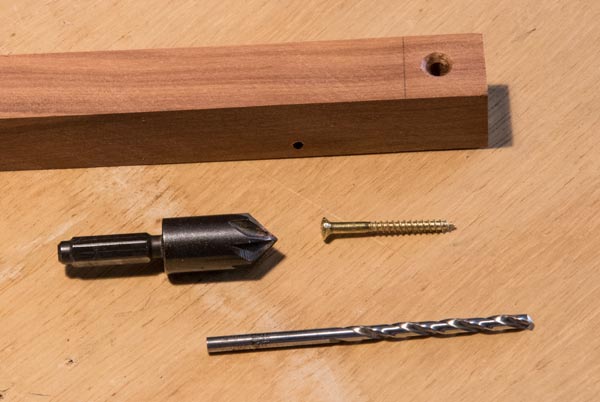
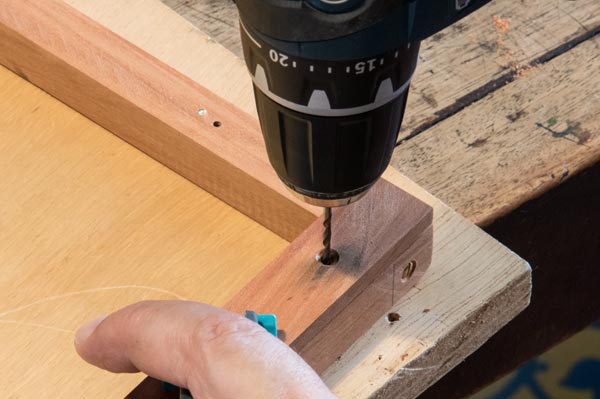
To mount the frame, a single 3x30mm screw is required in each corner. An observation for those who do not know anything about wood work is that the hole in the first wood should let the bolt pass loose. It does not get a thread on the first wood, only on the second. Note that the bit is thicker than the thread. If you have a tip to embed the screw head on the wood (pictured above), it will look more beautiful. If not, a large drill can also do the job. Start with that because with the smaller hole already made there is a tendency for the thick drill to be “pulled” into the wood, and then you have damaged your batten.
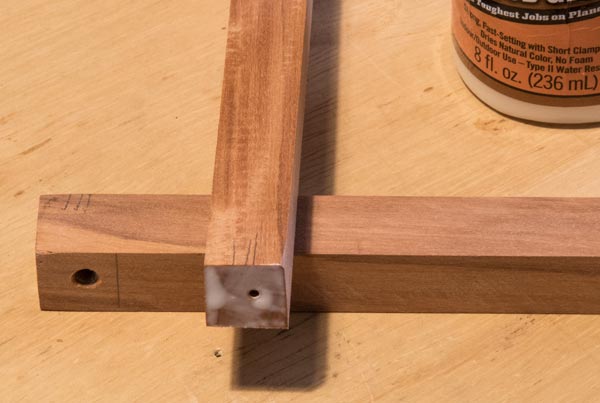
As we are talking about a single screw it is a good idea to pass glue on the joint. White glue for wood is ideal. It is best to drill holes and assemble with the bolt first, without the glue, check if everything is OK, and then disassemble and reassemble by gluing. It is not good practice to mount with glue directly.
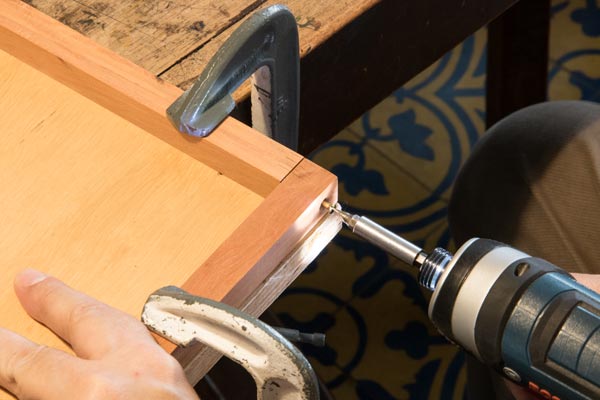
To assemble it is important that the parts are securely fastened. It is an excellent investment in the quality of your wood works if you get two clamps as shown in the picture above (if you do not already have those). The through hole (in the first wood) is made in advance. Then, with the pieces clamped in a wood in the square (90º corner), the threaded hole is made and then the screw comes in with the parts still attached. This ensures good positioning.
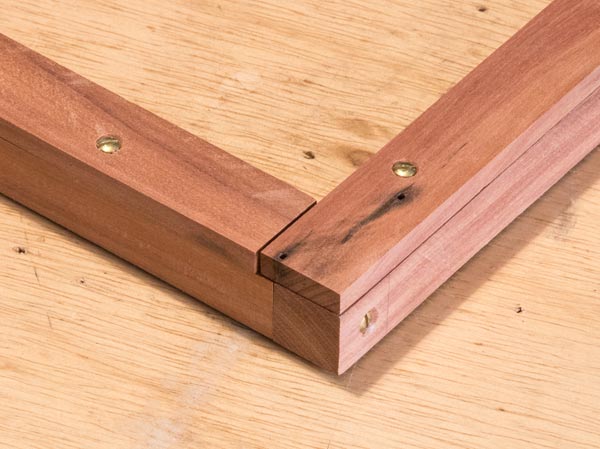
On the first frame 2×2 cm will come another frame 2.5 x 1 cm or something like that. It is not so critical that this is the measure. The important thing is that there is an excess that will be advance into the frame because and that is where the glass will be hold.
Again, the same pattern, drill the through hole and then, with the pieces secured in position, drill the threaded hole. This is the moment shown in the photo above.
Once this second frame is made, screwed into the first one, it is already possible to place the glass and check that it fits correctly and rests on the edge of the second frame. 3 to 5 millimeters of support for the glass will be sufficient. It is important that it rests equally along the entire length of the edges. If that does not happen, it’s because the structure bogged down. Emergency treatment: With the glue still wet (if not, loosen and reapply), place the frame on a flat table, loosen the screws of the first frame slightly to relax the structure, place the glass with a good weight in its center until this weight forces the structure to flatten (between the glass and the table). You can also use clamps to firm it into position. With it fastened, tighten the bolts until good tightening is achieved, but before letting the structure bent again. When the four bolts are in the grip that still holds the frame in the plane, let the glue dry overnight and this should solve the problem.
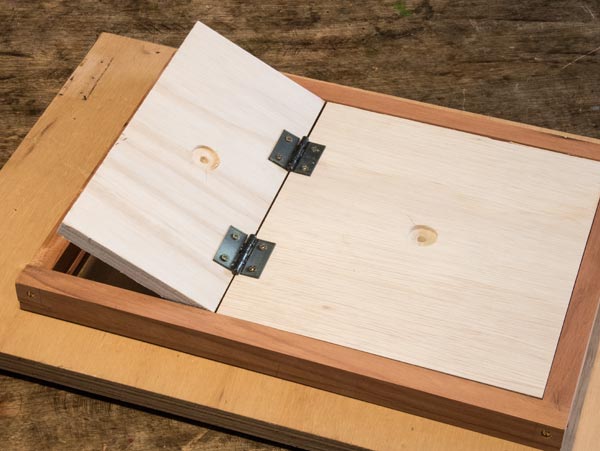
Now it’s time to make the foldable back. I chose an 18 mm plywood. I think less than 12mm will not offer a good solidity. Do not use MDF, plywood is much more reliable in regards to deformation. Remember that this part needs to be flat like glass. If by chance, after mounting, due to the lack of quality of the hinges, you notice that there is a difference between the two sides of plywood, loosen the hinges and cover the deepest part with cardboard, thick paper or anything firm that compensates the the hinge defect.
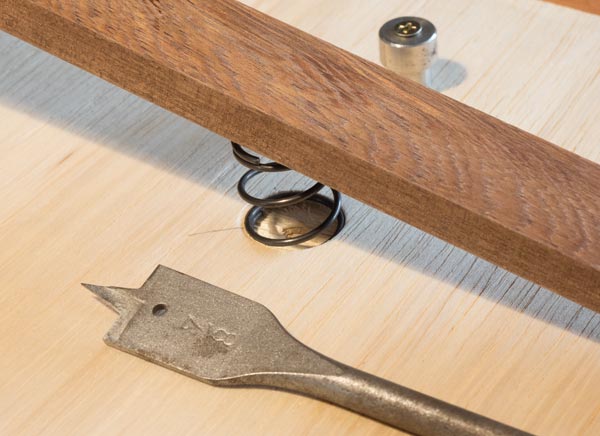
Flat springs, as used in the past, are harder to find. I adapted two springs I took from a printer before throwing it away (I always removed springs, motors, screws, connectors … etc, etc … a good habit). But they are nothing special and you can easily find springs that will suit your project in your city or the internet. In order for the spring to be firmly hold in position, I used a flat drill (photo above) that made a recess in the plywood. You will have to improvise something according to your spring.
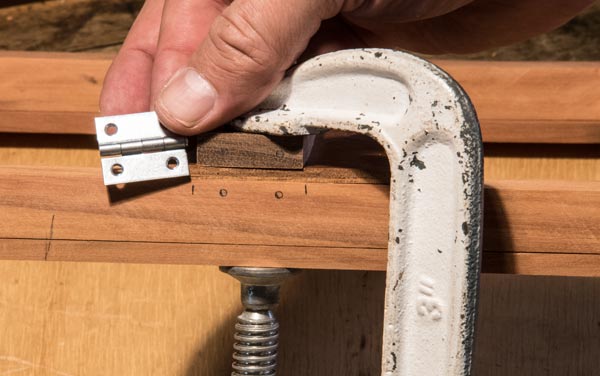
Now it is necessary to place the two wood pieces that will compress the springs and thus make the back compress the glass. Use the clamps again to secure the parts to their intended position. It is very difficult to mark or punch loose parts. With the clip holding the two pieces mark the position of the holes (photo above).
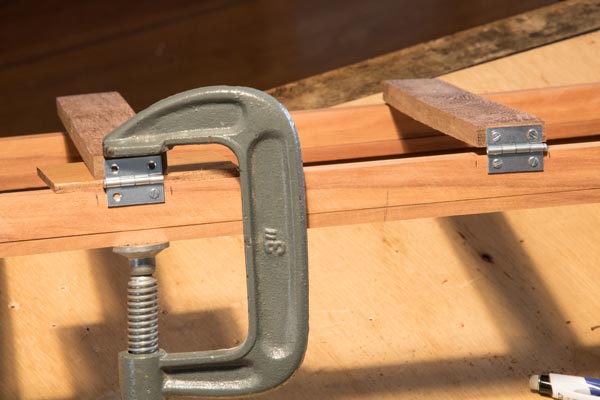
It is not good practice to drill all four and then screw the hinge. Unless you have a bench drill, it is very common for the drill to slide sideways a bit and get off the mark. Drill only one (photo above, left hinge), insert the screw and use the hinge as a guide to drill others and screw.

On the other side of the crosspieces you will need a clasp. This type of hardware is found in stores of articles for those who make bags, boxes and handicrafts. If not, some hook can solve. Two screws with their heads out and a ring would be the roughest case, but it would work.
As a finish, you need to cover the bottom with some foam. I’ve used 2mm EVA and it’s working fine.
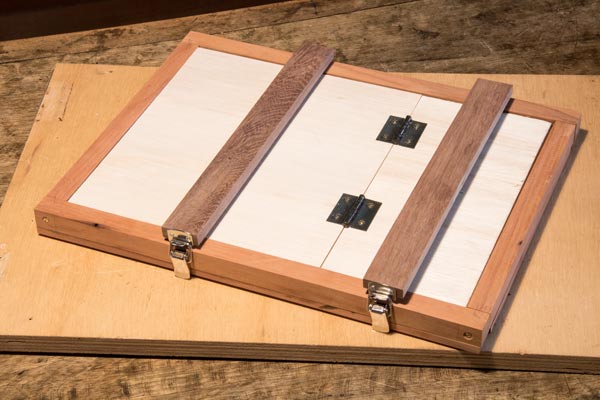
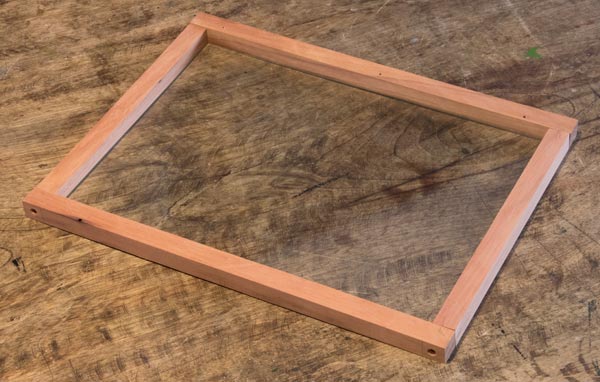
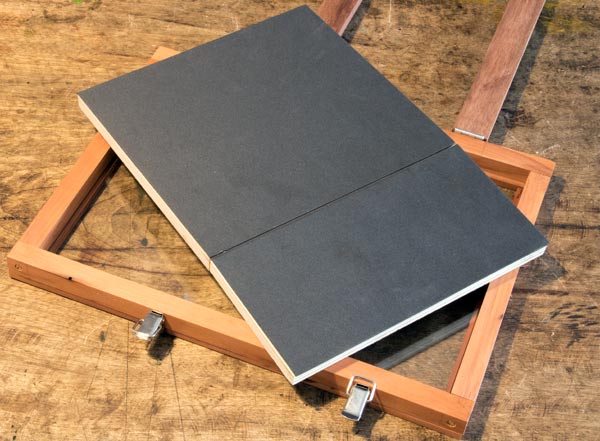
Ready, the press will look something like the picture above. The hinged back divides the bottom into 1/3 and 2/3 and the crosspieces pass through the middle of each of these parts.
Finally, the view from the side where the sensitive paper or material will be placed to receive the light. Depending on the thickness of the material to be printed, the spring and two crosspieces on the other side must be thought to allow some flexibility. But for paper and film in general, you do not even have to worry about it.
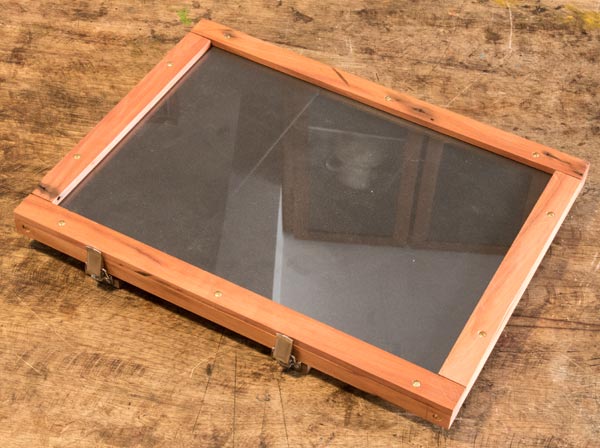
Well, this is a project of very low difficulty level and very large tolerance. The fitting of the wood need not look wonderful and if the frame and back fits well to the glass, with uniform pressure throughout your area, that’s all that matters.
Very helpful!
Thanks for sharing this design. My approach will be similar.
Thanks for posting these build instructions. This is exactly what I need for gum bichromate and other alternative processes. Also good to see a like-minded person who salvages bits and pieces such as the glass platen and springs from an old office copier or scanner.
Hello,Tom!
You have provided the instructions I’ve been looking for. I am interested in alternative photography, specifically making Salt Prints. Your process for building a ‘sun-powered’ exposure device, using parts from an old scanner, is a brilliant re-purposing into a new life as an essential alternative photography tool.
Thank you
Very nice design using only hand tools. Thank you for documenting and sharing it.
That is an excellent idea of using glass from an old scanner. In addition to being hard, I wonder if it is also more clear than window glass, which often has a green tint visible on the edge?
Hi Tom, I haven’t seen any specs of glass used for scanners compared to window glass. But I think we can assume the manufacturers demand more optical qualities for such an application.