Retouching B&W photos with local reduction
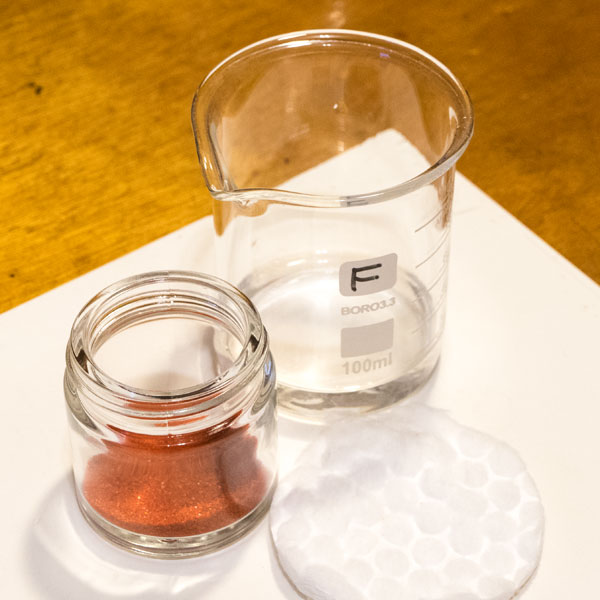
Often in a silver gelatin paper photograph, once fixed and washed, we notice that some parts, usually in the highlights, would look better if they were brighter, more prominent. The remedy for these situations is to finish with a special retouching with a solution called “reducer”. It is basically a solution of Potassium Ferricyanide, a reagent that is very bright red and capable of dissolving the silver that gives density to the blacks and grays in the photograph.
To know more about Potassium Ferricyanide see this Wikipedia page. It is not a high toxicity reagent, it is classified as an “irritant”. On the other hand, I have found no reference or indication that it does any good for our health. So, as always, you should avoid contact with any part of the body, either pure product or solution. If this occurs, it is recommended to wash the area with plenty of water.

This photo was taken in the city of Évora, Portugal, with a Super Ikonta IV and Ilford FP4 film. The print was on Foma paper. Looking at this copy, I found that if the stones’ reflections were a little more pronounced, lighter, without compromising darker tones, the photo would look better. The stones would make a counterpoint to the lamps and give more balance to the composition.
The use of Potassium Ferricyanide is exactly for these situations. Properly used it causes a change that is much more noticeable in the light regions than in the dark ones. Bleaching happens slowly at first, but the speed increases and if a certain threshold is exceeded it even “washes” all the density of gelatin and we get areas of pure white. This can have an interesting effect in some cases, for example in details such as spot light reflections. But overall, to preserve a certain naturalness, we need to stop the process before it happens. Large washed areas without texture look more like flaws than having any effect. Anyway, it is better to err for less, because it is always possible to restart the process and thus approach the ideal point by small steps. The way back, however, once the matter has been taken, will no longer be possible.
There are many variations on the use of Ferricyanide for this purpose. You will find more than 15 reducer’s formulas if you search on the web. There are some more appropriate to correct over exposure or over development. Those are called proportional reducers, as they act most strongly in the denser areas, and others called cutting reducers that tend to increase contrast because they act evenly, but the light parts, visually, suffer more from silver removal.
In this example I am showing one that I understand classifies mostly as retouching. It is the frequent situation when we want to highlight a specific area of the photo by making it clearer, more contrasted with its surroundings. For this type of action, the superficial, cutting ones, are the most appropriate.
Directly working solution can be prepared on time or two stock solutions can be diluted at the time of use. For example, for those who frequently use local reduction, it may be interesting to have two such solutions ready as indicated by Viebig:
Solution A: | |
| Potassium Ferricyanide | 10 g |
| Water | up to 100 ml |
Solusion B: | |
| Sodium thiosulfate | 25 g |
| Water | up to 100 ml |
A basic working solution is made up of 1 part A, 1 part B and 10 parts water. This can be more or less diluted. The more concentrated, the faster the bleaching.
Particularly I prefer to use the fixer I always have in the lab instead of Solution B (since I never use fixers with hardener) and prepare Solution A with a pinch of Potassium Ferricyanide and water. With little experience, because of the color intensity, it is already possible to have an idea in terms of the energy of the solution.
Local reduction as a printing routine
I observe that those who are starting in photography with films today, I can’t guess why, tend to have a more timid vision of the possibilities of the medium. It is as if for analog printing the photographer had no more than the contrast and exposure adjustments to make. But since its invention until the end of the 20th century, photography has always included retouching practices as being routine, almost a mandatory step in obtaining a good positive.
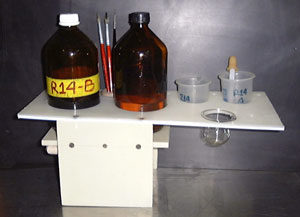
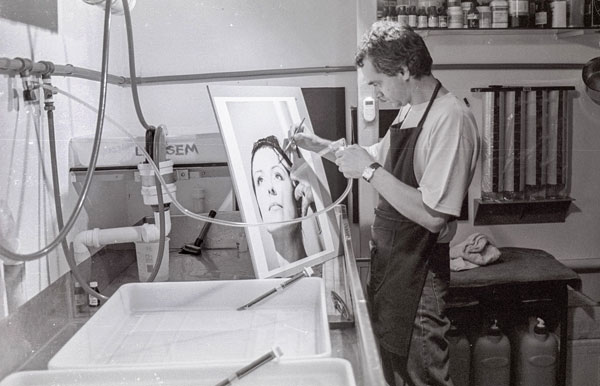
A “retouching station” was an integral part of darkroom space organisation and it was as big as the need for prints would demand. This is a nice set up with the R14 reducer (solutions A and B), which was used in the professional laboratory Mister Labo (in São Paulo), active in the 90’s. Very convenient, it was always ready with bottles, gauges and brushes. The glass container allows visualisation and thus helps to estimate the strength of the working solution by the intensity of its color. In the photo below we see Claudio Machado, also at Mister Labo, at the moment he retouches while holding hose flowing water that allowed him to immediately interrupt the action of the reducer. Claudio recalls that they called the reducer “bottled sun” and considers that ferricyanide and selenium toners are mandatory in almost any black and white print.
Workflow in local reduction
In the video below the retouching of this photograph is shown from start to finish. From the dilution of Ferricyanide to the interruption of the process of flowing water to quickly remove the working solution. I prefer to reduce copies that have already been dried. This helps a lot to better assess what the purpose of the process will be. In such cases, before starting with the reducer solution, the copy must be immersed for at least 5 minutes in room temperature water so that the gelatin swells and is ready to give better access to the chemical bleaching.
It should be agreed that the end result represented an improvement over original photo. But regardless, the purpose here was merely to show the possibilities of reduction. If you are new to analog photography, I think you would be surprised at the extensive use that professionals and amateurs have always made of reduction. In digital I think it would correspond more to sharpening than dodging, which is protecting parts of the copy on the enlarger so that they are clearer. This enhancement practice comes from painting and is a way of directing the viewer’s attention to what we want. These bleached points are really highlighted and therefore have this effect. If you’re interested in going further, this digital sharpening article has something about how painters were already sharpening with paints and canvas.

Some more tips:
- Usually the retouched area brightens a little more in the fixer. That is why it is better to stop just before the ideal point.
- Old fixer is more likely to stain retouched areas. This is why it is best to use fresh or underused fastener.
- Before and after retouching, avoid fixers with hardeners as they tend to stain photographs during bleaching. In the article Mix Your Formulas, you have a recipe for a classic fixer and probably the cheapest one you can find.
- Subsequent washing, even if it is a second wash, should be as good as the first one after the fixing bath in the printing process
- Local reduction is a good alternative to dodging when increased contrast in the area is desired. For it acts most strongly in bright areas while dodging also brightens shadows.
- Printing locally with higher contrast in the case of multi-contrast papers could have an effect similar to that achieved by reducing the photo above. But often, masking the enlarger’s projection is more complicated to do than later chemical reduction with a cotton ball.
- When the area to be retouched requires greater precision, it may be interesting to drain the copy, leaving it only moist, so that you have greater control of the affected area. One can also use brushes for a more precise application. Use a well diluted reducer. Apply, wait about 20s, wash and evaluate whether to reapply or stop. This gives you more control and is better than trying to do it as if you were “painting” with the counter.
- Do not prepare too much reducer solution as it does not hold up over time. Better to do just for immediate use.
For a more clearer comparison of the effect, here is a .gif with before and after scans: