Mix your formulas – black and white photography with just 8 reagents

It is not as difficult as it may seem to prepare formulas for use in a black and white photography lab. If you like shooting with analog cameras and are sending your film to an external lab or buying ready-made formulas from major manufacturers like Kodak, Ilford, Tetenal and others, you’ll find in this article some points to consider in an assessment of whether to start, in full or partially, to using homemade formulas.
Both for films and for papers the processing in the laboratory has 3 phases in which the material is bathed in:
- Developer
- Stop Bath
- Fixer
After fixing it is only a matter of washing in plain water. I will not go into the detail of what each bath does because if you are thinking of preparing your own chemicals, you certainly know what each one does. There are side or additional steps / processes such as fixer clearing, development in two baths, toning, using a emulsion hardener, etc., etc. But the idea here is just to explore how simple the process can be.
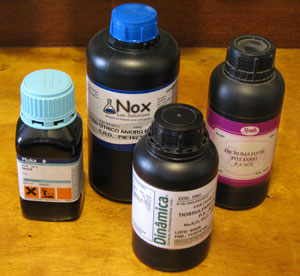
Reagents are typically sold in glass jars or a sturdier plastic with lids that close tightly. Be wary of suppliers who send poor packaging, plastic bags for example, because handling care and good storage conditions are key and indicative of the quality of what is inside the packaging.
1 – D23 film developer
As you might know there are developers that are stored as concentrated, stock solution, that is diluted for use in what is called a work solution. There are others that are prepared directly in work solution. The proposal here is to use a developer of the second group that was formulated by Kodak and known as D23. This is a developer that uses only 2 reagents: Metol and Sulfide Anhydrous diluted in water. Ideally, it should be prepared as close as possible to the development (I have never tested more than 1 hour in advance). Like most film developers, good practice dictates that the work solution should be discarded after use. That way, only the amount needed for a session should be prepared. In this way you store only the powdered reagents do not worry very much about expiration (usually long) or rapid changes in the characteristics of them.
The formula is as follows:
Metol 7.5 g
Anhydrous Sodium Sulfite 100g
Water up to 1 liter
Mixing
Start with 750 ml of water heated to 52 ° C. The Metol is slowly added as the solution while you stir it gently (avoid air bubbles) . When the Metol is perfectly dissolved, the same is done with Sodium Sulfite. Finally, make up to 1000 ml (1 liter) with water. You can use ice instead of water to speed up the cooling.
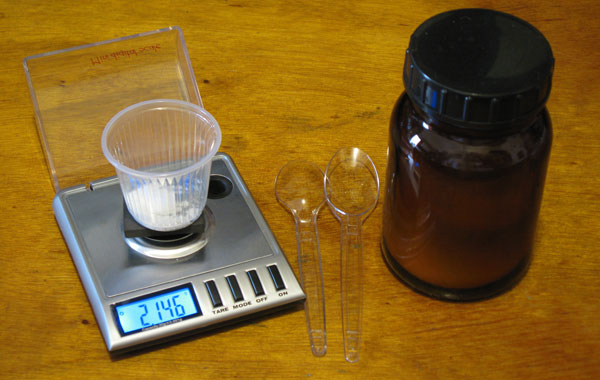
It is very convenient to use a digital scale with 3 decimal places, that is, to go up to thousandths of grams, because to develop only a film 135 the amount of Metol is greatly reduced and therefore subject to important percentage variations. These scales are now in online trading at very reasonable prices. I always use disposable coffee cups and spoons that are trashed after each measurement and I avoid returning reagent to the bottle. A scale with a thousandth of a gram will not go well beyond 20 or 30 g of maximum capacity. Consider then also acquiring another one up to 500g and accuracy of tenths of a gram.
D23 formula for several volumes:
| 1 liter | 400 ml | 300 ml | 250 ml | |
| Metol | 7,50 g | 3,00 g | 2,25 g | 1,88 g |
| Anhydrous Sodium Sulfite | 100,0 g | 40,0 g | 30,0 g | 25,0 g |
Usage
You always have to test. With formulas prepared at home this is even more important as they are more subject to variations because of the small quantities and lack of quality control over the reagents in order to maintain a standard. Water is very important. Usually tap water serves but should be filtered and if possible boiled in cases that are too alkaline. In case you find persistent problems, it can be interesting to test the process with distilled water to isolate the variables. I have used water collected from air-conditioning and this has been very satisfactory. More than just the end result I see that the chemicals dissolve quickly and form a clear solution.
A starting point for D23 would be somewhere between 8 and 10 minutes at 20 ° C with films between ASA 100 and 400. Agitation during the first minute, and then 5s every minute, is also a starting point to be validated or changed.
Features
The D23 is considered a fine-grain developer and this can be very interesting for those who use small and medium format. Metol is an energetic developer and that means that greater contrasts are obtained only with longer times. It is a nice option when the subject itself presents a very long tonal range. I’ve had great results in outdoor photos on sunny days and also in urban night shots when the contrast of the subject is too high. Although it is very simple, it is not at all a second-line developer. Ansel Adams used it a lot and on several occasions he praised its performance. The great inconvenience of this developer seems to be the need to be prepare directly as working solution since there is no way to make a concentrated D23. Also for this reason it can not be marketed. But for those who make photography in more modest volumes this should not be a big problem. More info about it can be found in Ansel Adams’s The Negative.
1.1 – Parodinal
Another very practical developer to make and use, with complementary characteristics to the D23 is the Parodinal. While D23 is a developer that tends to have more controlled contrast and fine grain, Parodinal is more contrasted, has a more pronounced acutance and generates larger grains. But it is still a universal developer that deals very well in many situations. It has a long shelf life in concentrated form. There is a page just for it here on the website. Follow this link: Parodinal.
2 – D72 paper developer
Apparently there is no developer as simple as the D23 for papers. It is very convenient, in the case of papers, that you work with stock solution that only dilutes at the time of use. A restrainer agent that avoids fog is also very desirable. These are necessities and they cause the number of reagents to increase to 5 or more. That is the case of D72. It is a developer that gives pure black tones in Bromine papers (unless otherwise noted, all available papers fall into the Silver Bromide category).
Formula:
Water 750 ml
Metol 3 g
Anhydrous Sodium Sulfite 45 g
Hydroquinone 12 g
Sodium Carbonate Anhydrous 67 g
Potassium Bromide 2 g
Water to complete 1 liter
Mixing and using
Heat the water to about 50 ° C and dissolve the reagents one by one in the indicated order. Some sources indicate dilution as: 1 developer part + 4 parts of water. This is the only paper developer I have used for many years and I found that for me the 1 + 3 dilution is more appropriate. I do not control development temperature when using papers and in the summer it happens sometimes that the bath reaches 28ºC. I compensate this high temperature only in the time of exposure under the enlarger and this has worked well.
.
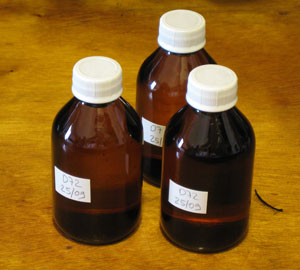
The air and consequent oxidation is an enemy for the developers. To minimize this effect it is good to avoid jars with too much air inside. This is difficult if a 1 liter bottle is used and the solution gets reduced by consumption. You can get around this situation by breaking the developer right after you prepare it. I use 8 amber glasses of 125 ml each that are filled and well closed. To make an enlargement session, I use that glass to dose the ratio of 1 developer +3 of water and thus prepare 1/2 liter of working solution. That’s more than enough for 24 x 30 cm trays.
3 – Stop bath
The most common is based on Acetic Acid. This can be purchased in a form called Glacial which has a purity close to 100%, while the one simply called Acetic Acid is a 28% solution. It’s the same bath for both film and paper. Literature mentions most often something like a 2% solution of Glacial Acetic Acid or 4.5% by volume acetic acid (45ml / liter in Adams ). These concentrations are designed for baths that will be reused. In practice, for a home darkroom, where processed quantities are usually small and the sessions more occasional, I recommend, in the case of films, a much lower concentration and the disposal of the bath soon after use. In the case of papers the stronger/normal solution is made and it is stored and reused for a number of copies. It would be something like this:
| film | 4 ml Glacial Acetic Acid oor 14 ml Acetic Acid | 1 liter water |
| paper | 20 ml Glacial Acetic Acid ou 70 ml Acetic Acid | 1 liter water |
The regular time in this bath falls between 1/2 and 1 minute. Resin papers (RC) show developer action interrupted in 1/2 minute. Fiber papers should be left for 1 minute. In the case of films, using a weaker solution, leaving 1 entire minute is good a practice. There is no observable damage if these times a bit longer.
Abaut exhaustion, the ideal would be to measure the Ph with indicators and reuse the bath while it is acidic. In the absence of that resource, it is best to discard the bath after something like 30 x 18 x 24 cm prints to make sure there is no developer being carried into the fixer bath. The drawback is to exhaust the fixer before time, it costs far more than the stop bath.
Acetic acid is very unpleasant because of its strong smell and still very irritating to the skin and dangerous to eyes and mucous membranes. It can be replaced by other more friendly acids without much increase of cost. This is the case of Citric Acid which is presented in crystals and can be dissolved in the proportion of 20 g per liter.
4 – Fixer
The classic fixing agent is Sodium Thiosulfate, known in photography just as “hypo”. It would work alone but its solution does not last long and so the bath should be acidulated to increase its stability. Potassium Metabisulfite is used for this purpose. The following formula is Adox F33:
Sodium Thiosulfate 250 g
Potassium Metabisulfite 25 g
Water up to 1 liter
Mixing
Heat 750 ml of water to approximately 50°C and slowly add the Hypo stirring constantly. If you let too many crystals accumulate inside the water, dissolution becomes much more difficult. It is more productive to actually add slowly, at about the same rate as dissolution. Do the same with Metabisulfite.
Usage
This fixer can be used for both papers and films. As trays tend to collect dust and impurities, consider filtering the solution from time to time. Another measure is to make two jars, one for papers / films in trays and another for films in tanks. This second will tend to stay cleaner.
Many people like fixers with hardeners that make the gelatine more resistant mechanical contact. But handling film with care in a home lab with little volume, the common fixer solves the issue very well.
There are quick and efficient fixers based on Ammonium Thiosulfate, but this reagent is often hard to find in small quantities so I am not considering it here.
The exhaustion of a fixer gives clearer signals than the stop bath. The film starts showing emulsion residues on the edges, it takes longer to clean completely and that means the bath needs to be changed. The same thing happens, with the due differences, with papers. But attention, when this happens it is a sign that the time to change has passed already. Observe and go for renewal prior to these critical symptoms.
5 – The 8 reagents and what is next
If you count, you will see that in the formulas above, all together, were listed:
- Metol – Developing Agent
- Hydroquinone – Developing agent
- Anhydrous Sodium Sulfite – Conservative in Developers
- Anhydrous Sodium Carbonate – Accelerator in Developers
- Potassium Bromide – restrainer, anti-fog in developers
- Sodium Thiosulfate – Fixing Agent
- Potassium Metabisulfite – Acidulant in Fixer
- Acetic Acid – Stop bath
This would then be the starter kit for a complete B&W darkroom. If only films are developed for further processing in digital, only 5 reagents would be enough. Certainly there are other options to get started, if you have any suggestions, contributions are always welcome. I am suggesting this kit because those are formulas that I have used for many years.
There is some flexibility in this set as these are very classic reagents in darkroom photography practice. For instance, it is also possible to make a universal developer, for films, with the same ingredients in other proportions. So consider this a starting point that will open up many possibilities. These reagents are a kind of mandatory in any B&W lab.
Universal Metol-Hidroquinone developer
Water at 30 ° C – 750 ml
Metol – 3 g
Anhydrous Sodium Sulfite – 75 g
Hydroquinone – 11 g
Sodium Carbonate Anhydrous – 75 g
Potassium Bromide – 1 g
Water to complete 1 liter
This formula I found in a classic book published in Brasil: Formulário Fotográfico writen by Reinhard Viebig (I have the seventh edition, 1985). This formula should be used as follows:
- Used undiluted, it acts very fast and gives a strong contrast, develops photocopying, process films and radiographs in addition to all the material that is intended for contrast.
- To develop films or plates with normal contrast, 1 by 5 dilution is done.
- A gentle development is made by diluting the developer in 1 by 10 to 1 by 15.
- To develop contact papers (chloride) dilute 1 by 2 or 1 by 3 and reveal 45 seconds to 1 minute [I believe there are no such papers nowadays].
- To develop bromide and chlorobromide papers [these are the current papers in fiber or RC], dilute 1 by 5 to 1 by 7 and develop from 1 ½ to 2 minutes.
If you search you will see that with these or with the addition of a few reagents, it is possible to produce a large number of formulas and their variations. The wise photographer will advise you to focus and master a single or very few formulas that work well for you, instead of trying new things all the time. I find this advice very useful for professionals who cannot play or risk the outcome. That is not my case, thankfully.
6 – Safety
All chemicals should be handled with care. But there is a lot of neurosis about “chemicals” in general these days – as if nature were not all on the periodic table. I met a chemist who remembered that cooking salt is essential for the body and at the same time a handful of ingested salt can kill an adult. Keep in mind therefore that the reactions to chemicals are dose dependent, that is, depends on the time and amount to which the person is exposed. The degree of toxicity of the reagents normally used in photography added to the degree of exposure of the amateur laboratory demands only the most basic and easy to follow safety measures. Some points to keep in mind:
- Use instruments such as spoons and disposable cups and actually discard them after use. The same applies to the containers where you buy the reagents. I usually cut them with a blade before putting them in the trash to ensure they will not have further usage. The point is that the bottle (specially plastic ones) may contain traces of the reagent impregnated on its walls even after washing, and those traces may react unpredictably in a new use.
- Avoid mess in the lab. Most accidents, such as that of flasks and overturned cups, are the result of a counter cluttered with objects that do not belong to the operation being done. Clean the area, order the bottles that will be used, order the cups that will be used for the fractionation, place the scale in an easily accessible place and free of other objects. Have everything you need right at your hand so you do not even have to move around while preparing your formula. Keep away dogs, cats, children and other living things. Use a glass becker that is more stable and fit to make the solutions. It is not good to improvise here with ice cream pots, soft drink bottles and the like. Provide easy access to plenty of water in case you need it. Organizing the workplace is the most effective security measure, in my opinion, because doing so all your movements will go through a pattern expected to work out.
- When preparing stock solutions, when pure reagents are handled, gloves, goggles and dust/vapors mask are the best protection. Watch out for the sleeve of the shirt or apron.
- Pouring a reagent from one container into another gives away small particles of the reagent that can be easily inhaled. If you shake a container with powdered reagent to make it looser and easier to pick up, wait at least 5 minutes for the dust inside to settle and even then use a mask at these times. You will hardly expose yourself to critical amounts of reagent when diluted in water, if you take minimum care, but dust is an easy way to have some milligrams getting into your lungs.
- With the working solutions the situation is much more under control. Many past photographers did not even use tweezers or gloves. In the book by Ansel Adams there is a sequence of photos about development of several sheets of film in trays in which we see the operator, without gloves, with his hands just inside the developer.

Concentrations in working solutions are very low and only people allergic to one or other reagent will present any immediate problem with the exposure. But even so, precaution does not hurt anyone. Avoid touching the photographic baths. For papers use tweezers, roll films use tanks and film on film hangers or process one by one in trays. It is possible to get used to a work routine in which you do not touch the photographic solutions.
Get to know the reagents. A quick internet search is very useful for you to get an idea of the physical characteristics, toxicity and hazards of the reagents you use. Wikipedia is a good source for this because the reagents are all well known in chemistry and used in several other purposes besides photography. Some are quite harmless and others are more dangerous if handled without care. In your query search to “Material Safety Data Sheet – MSDS” plus the name of the reagent.
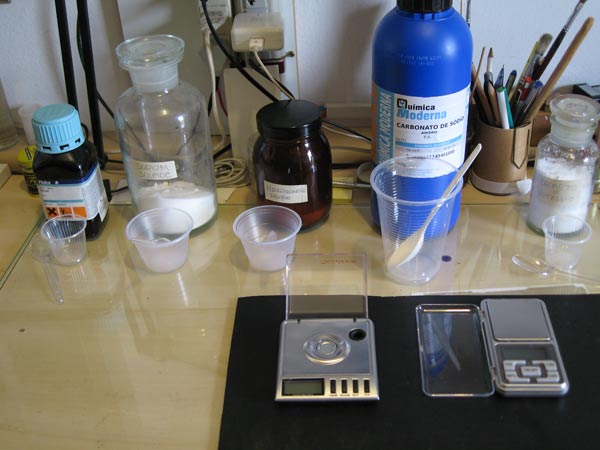
Above, preparation to make D72. All reagents aligned in the order they will enter the formula. All with their own cups and spoons in the proper size. The scale on the right has a precision of thousandths of a gram, goes up to 20 g and serves to weigh Metol, Hydroquinone and Potassium Bromide in this formula. The scale on the right has a precision of tenths of a gram, goes up to 500 g and is suitable for Sodium Carbonate and Sodium Carbonate. I do this dosage on the dry bench and only the already measuered amounts go to the wet bench as they enter for dissolution in the water.
7 – Environmental issues
If you have a home lab and process only your own photographs, no matter how much you photograph, it most probably does not reach the minimum volume to need to be monitored by some environmental control agency. Check with your regulatory affairs authorities. Many of the reagents used in photography go into cleaning products and even food and you can discard the baths normally through the sewer as well as you do while cleaning your house. If you need to dispose of reagents in pure form, it is better, more for citizenship than for any other reason, to seek a professional discard. Contact your supplier and he will guide you accordingly. To search the web, some keywords would be “reverse logistics” or “chemical disposal”. But you’ll probably find it easier to buy small amounts than get rid of them.
8 – Conclusion
The final question is whether it is worth bothering to prepare your own formulas. Let us then take a final account:
- QUALITY – Manufacturers’ formulas are better than the same formula produced at home. This is a fact and you can not escape. But you do not have to just make formulas from major manufacturers and the difference in quality and regularity is also nothing so terrible.
- WORK – In addition to the work on producing the formulas, which is not that much but for sure a lot more than opening a commercially purchased developer bottle, you will certainly spend more time testing from one preparation to another, from one supplier to another and variations you will be tempted to create and try yourself. If you see it as a challenge and have fun with the process, then that disadvantage turns to advantage.
- COST – It probably costs less to do at home. It depends on where you buy, what you buy, and how much you consume. If you want to estimate and compare, here’s a calculator that will help you accurately find the cost of any working solution for any photographic process.
- FLEXIBILITY – Huge advantage for the homemade option. You can experience endless variations, today’s and yesterday’s formulas, solutions tailored to your film or any other idiosyncrasy. In a short time you will learn the effect of each reagent on developer composition (the most interesting) and will be making your own versions. Some photographers throughout history, with more or less, or no knowledge at all in chemistry (the line of dilettantes began with Niépce and Daguerre themselves), have developed formulas that are now famous.
- INDEPENDENCE – Again, the advantage is in the home processes. These reactants are not unique to the staggering analogue photography industry and will probably always be on the market.
Well, all in all, you have to like it. If you like and devote yourself you will surely be satisfied with the results.
dear official
Can we use the same formulas in x ray film? (Developer, Fixer), (e.g Agfa D5)
what is your suggestion.
thank you
Yes, I use regular developers and fixers with X-ray film. There might be different performances depending on the developer, like with any regular b&w film. I have used Parodinal as a developer with good results rating the x-ray filme at ISO 100. I never tried with D23, so I can’t say about this one. I tested with Parodinal and it worked well, as it is cheap, very practical, I sticked to it. As film I have used Fuji HR3. Emulsion is double sided so I develop only in film hangers to avoid surface scratches.
What is the fixer dilution? 1+9?
This is already working solution.
Is it possible to do a developer with these 3 ingredients? Hydroquinone, Sodium carbonate and Ascorbic acid for low speed film and photo paper?
In chemistry I am a follower, I do not develop new formulas, just prepare the ones I find in photographic literature and I don’t remember seeing the mix you are suggesting. Sorry for not being able o help you.
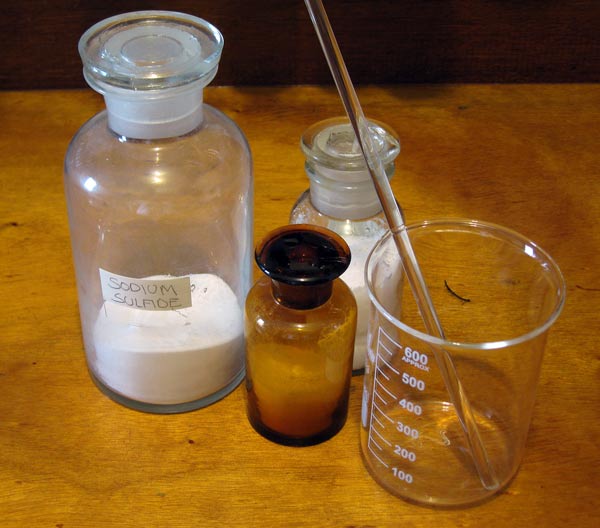
Hi, good article about making your own developers, but please correct the spelling for one of the compounds: it is Sodium Sulfite that you need to use, not Sodium Sulfide (Na2SO3 vs Na2S).
If you mix Sodium Sulfide with water you get Hydrogen Sulfide gas, a toxic, rotten-egg-smell gas.
Thank you, it is already done.