Often an analog photo print has white or black spot that need to be removed.
- White spots: These are usually negative glued dust or scratches that block the light from the enlarger and produce copy failures.
- Black spots: These are usually emulsion failures, often due to processing problems such as bath impurities. Failures in the film itself, with modern emulsions, are quite rare, but those who make dry plates, for example, live with the need to eliminate small black dots on the printing of their photos.
But retouching is not just corrective. There is also creative retouching to highlight elements of photography. In another article I showed the local reduction that aimed to clear reflections in the cobblestones of a street in a night scene. In this article we will look at a case of retouching that involves both the removal of silver, therefore lightening of the photograph, and the deposition of pigments to darken tiny parts of the same photo.
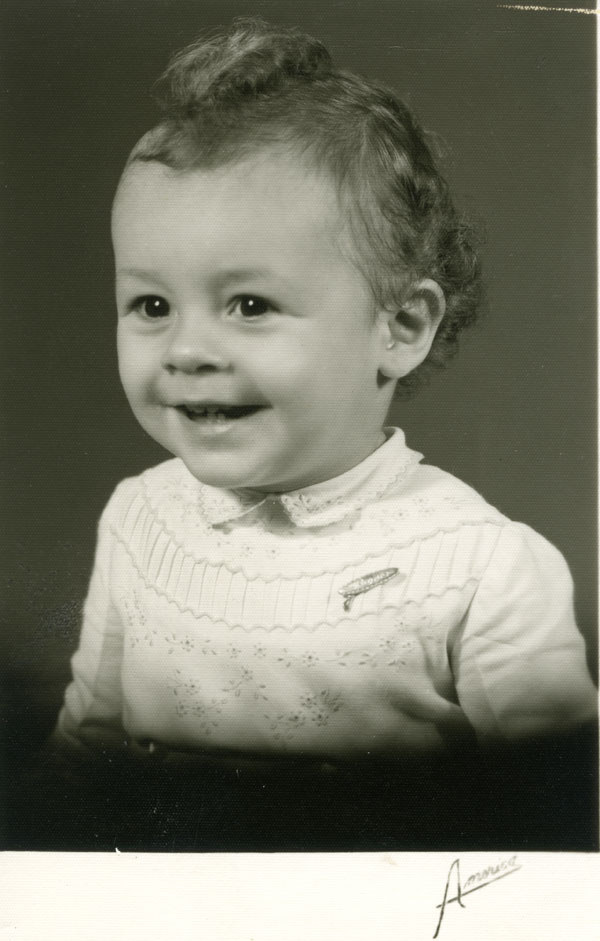
The case we will see was almost mandatory passage in studio portraits of former times. In the picture above it is almost certain that the reflections in the baby’s eyes, so well formed and bright, were an addition via spot retouching. Although it is myself in the photo I cannot say for sure because it may have had some specific lighting in the studio to give these beautiful catchlights, only I do not remember.
In the absence of a proper, well-positioned light to give this look a sparkle, the photographer could and still can use potassium ferricyanide for a very efficient retouching. But it is somewhat risky, as it can ruin a copy that is already done.
Spot retouching by reduction
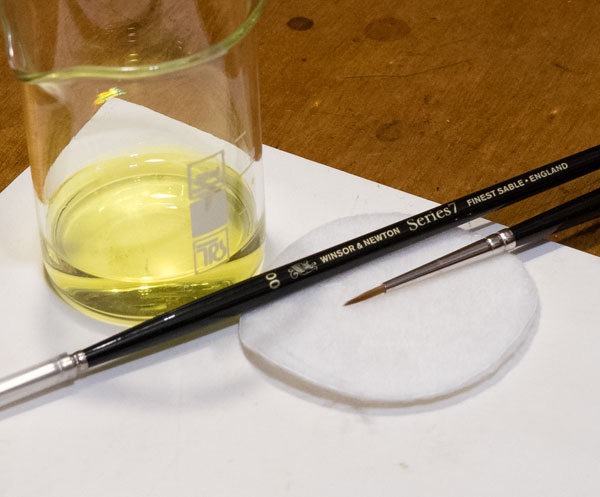
There are variations, but the procedure I have adopted is probably the simplest and basically consists of preparing a strong solution of as little potassium ferricyanide as possible and applying it with a zero or 2 zeros or up to 3 zeros brush directly on top of the photo slightly damp. If the copy is too small, you can even apply it with a toothpick. In the case of a toothpick, it is good to train well to find a way to regulate the reducer shape and load that will be deposited.
Within seconds we see the reagent attacking the silver and a brownish or yellow stain appears on the spot. The copy is then immediately washed with a gentle flow of water over the retouched area for a few seconds and then placed in the fixer for a few minutes. That must be as a normal fixation, followed by a normal wash as well.

This portrait was made with a 275mm f / 4.5 Eidoscope manufactured by SOM Berthiot, French, on a 4×5 “negative. This is a historic and very interesting lens in the soft focus lens category. The camera was a Linhof Technika 13×18 with back reducer to 4×5 “.
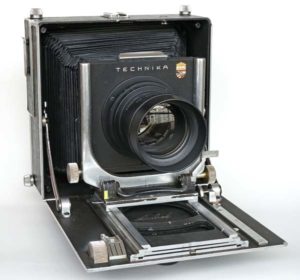 The Eidoscope, when fully open, produces a double image, one of which is sharp and one that adds something like an iridescence, or a halo, over the model if it is properly lit.
The above image is a scan of the negative, just as a reference to the raw image. Obviously there was an intention to flirt with the artistic conventions of religious images. But the photo as it was recorded in the negative still needed two interventions to create a truly mystical atmosphere. The first was a dodging & burning charge to make the figure an island of light in the darkness.
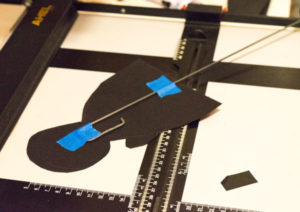
A mask was made to protect the projection of the face and body so that the background received twice the exposure. Then the hand was also burned one more stop because as you can see in the scan of the negative, it was much lighter than the face and turned away much attention. That was due to the fact that, at the time of the photo, it was illuminated by a large window and being at a lower height, it received a lot more light.

This is then the copy made on paper Ilford Fiber MG in 18×24 cm. To reinforce the role of charismatic leader, this prophetic and wisdom-filled look was to be valued more highly. It lacked more brightness, it lacked better defined catchlights. Then came the spot retouching.

At this point, the photographer wonders if what he is seeing is the same as what other people will see in his photograph. He wonders: will they realize the trick? Knowing the artificiality of these catchlights, I couldn’t look at anything else while having the photograph in hands. They seemed extremely exaggerated and artificial. But perhaps, for an uneducated observer, this would just be a “penetrating” look. In any case, I decided on a more discreet effect, probably less glaring and thus even more persuading to skeptics like me.
Spot retouching with pigments
While reduction has no way back, spotting retouching by depositing pigments or dyes can be done with much greater detachment. Most of the substances used are water soluble, so if you regret it, simply wash and start again or even abandon as it was. But beware, some residue, however slight, may be impregnated in gelatin even with the material being soluble. It is therefore good to be careful and not rely so much on the total reversibility of the process.
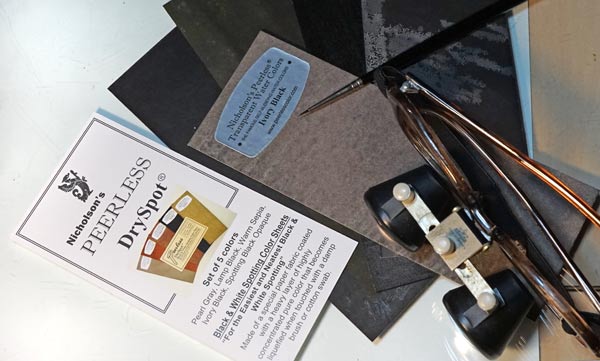
For many years I used china ink, then bought a Peerless Dryspot® sheet set. In addition to being far superior to the china ink, it seems that at my retouching pace will last longer than me. So, with a 3 zeros da Vinci brush, made in Germany, I decided to reduce the intensity and shape of the catchlights.

This result has pleased me a lot. That was the final image I had in mind since I thought of a possible matching of the lens, the light, the pose, and Rodrigo Silva, whom I take the opportunity to thank. I believe that Eidoscope’s soft focus contrasts well with the sharpness of the enhanced catchlights, that was the idea, but an exaggerated effect hampered the reading of the photo. After retouching with Dryspot I think it came out at the right balance. There was a significant gain over the original photo.
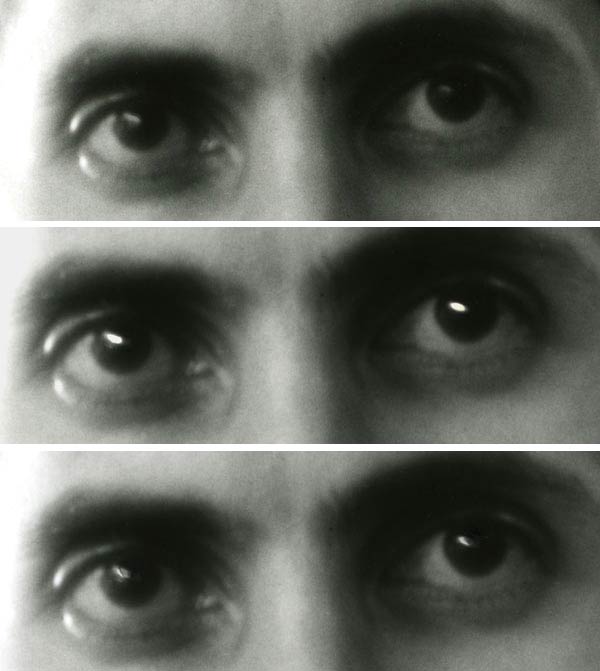
Here a side by side comparison of the three phases. Although not made for magnifying glass, I think we can say that catchlighs other than perfect white balls or ellipses look more natural. I followed, or tried to follow, the shape and position of the reflections that already existed and still give an irregularity in their brightness.
Following is a video to illustrate the desk and workflow. It is nothing as an academic reference, but I think it will give a more concrete reference of how it can be.
Corrective retouching
The procedure for purely corrective retouching is exactly the same. Dots that need to darken get directly the pigments, and points that need to lighten are reduced to white and then brought into the shade of its neighbourhood so that they disappear once and for all. I think it is practically impossible to lower just to the density point around the black or gray point. It would be necessary to deposit the reducer in the concentration and quantity necessary to bring the point only to a certain shade and stop there. The most feasible thing is to really whiten and then darken.
In the case of spots that need to be darkened, do not underestimate the size of them thinking that because they are so small any black will do. You need to evaluate whether it is a cold or warmer black paper and look for the most appropriate retouching. Even sepia toned copies can be retouched. It takes patience and testing pigments and combinations to find the one that will disappear on the surface of the photo. White and black have color! Retouching must be the right color of gray.
The paper gloss or matt finish may be another variable to consider. In the case of glossy ones I believe that with them it is more important that the gelatin is moist. If the pigment can penetrate it, chances are that the shine will be preserved and you will not end up with a matte spot in the middle of a specular surface.
If you liked this article you may find interesting as well the following ones: Retouching desk, Negative retouching and Local reduction.
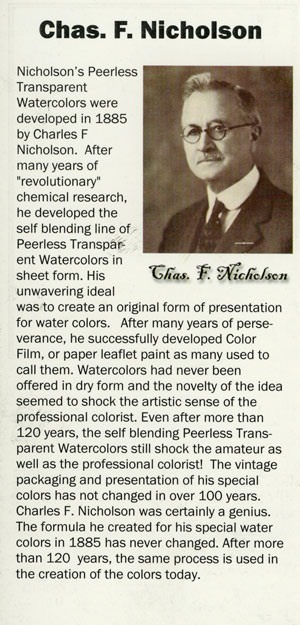
It is not advertising but I will add this print that comes with Peerless sheets simply because I think so cute a product like this to be marketed in the 2020’s.
Comment with one click:
Was this article useful for you? [ratings]
Muy bueno, educativo e interesante. Gracias
Hi! I have some very underexposed 4×5 B&W contact prints that I can’t rescue with a digital scan without amplifying the surface and sub-surface noise of the print . Would soaking the print in a light solution of potassium ferrocyanide improve the grayscale enough for a quality scan? If not what would help? Doing a scan of the proof as is and changing the gamma does help show detail, but overall the picture looks terrible.
The only effect you can get with potassium ferrocyanide is overall density reduction. I think that this is the opposite of what an underexposed print needs. Pale grays will turn even lighter and eventually sheer white. I heard of people reducing and re-developing a print, like toning. But that is a highly specialized procedure. What could help in improving the paper surface imperfections and noise is a wet scanning. You’d better search the web by this key word and find some nice tutorials. The basic idea is that a film of water between your print and the scan glass will conceal scratches and textures on your paper. People do that mostly with film, but the same principle applies to paper as well. The rest is about working with gamma, as you said, in order to bring your histograms to a better rendering of your images. I hope this helps.