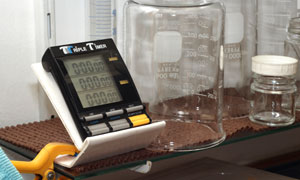
A simple and nevertheless very important point in darkroom practice is keeping control of time for baths and processes. For a long time I used the “triple timer” and it it never failed. It works till today. But the electronics embedded on it falls very short when compared even with an entry price smartphone, and there is always somebody developing applications and content that make use of that available capacity.
The Digitaltruth darkroom timer is one of those cases. Visit the page Digitaltruth and follow the instruction to download in Android or OS environments. It is an app that stores a database with hundreds of films, developers and times. That works as a suggestion for you to start. It also allows you to edit and store your favourites combinations for negatives or prints development. Check some of the screens:
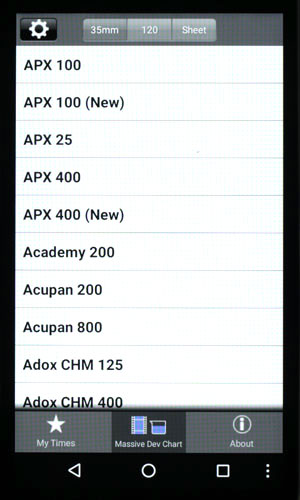
Your start setting film format: 35mm, 120 or sheet film. Right after comes the film in a long list of them.
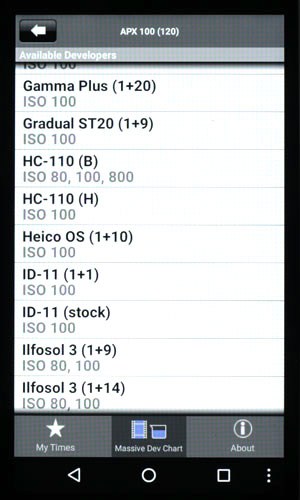
Pick a developer.
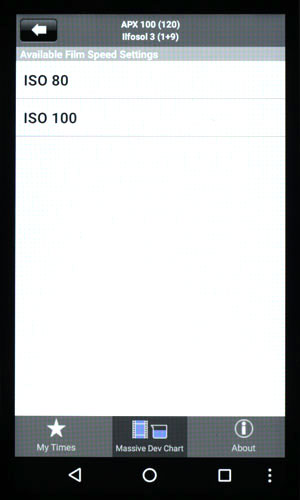
Next screen will prompt you with ASA value for processing. To some combinations there is more than one option available and to some only one that you must click to continue.

At this point you are ready to start, but, in case the found settings do not suit your whishes, click the star on the right upper corner and confirm the edition mode.
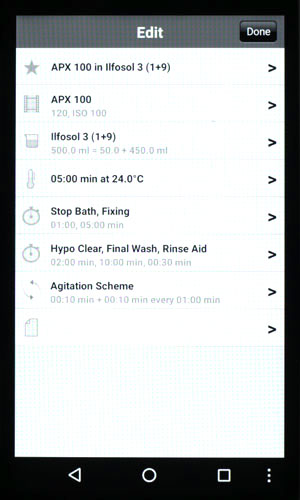
Everything can be changed. Even the process’ name. In this way, starting from some existing record, you create a routine of yours. Click Done and you go back to the previous screen with new settings. This one you just created will be stored and can be recovered (and edited again if you want) from the starting screen by clicking the option My Times.
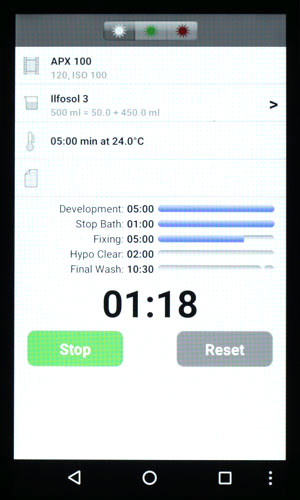
There is an audible alert for starting and finishing each phase. The agitation intervals are also signalled. Normally, after I have started, I do not check the screen anymore and let the alerts guide me through the steps.
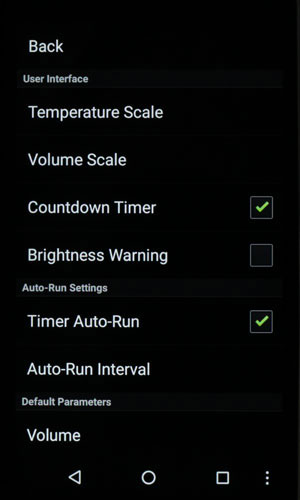
Most important settings can be adjusted in a configuration screen. Countdown or progressive timer, ºC or ºF units, length of agitation intervals, among others.
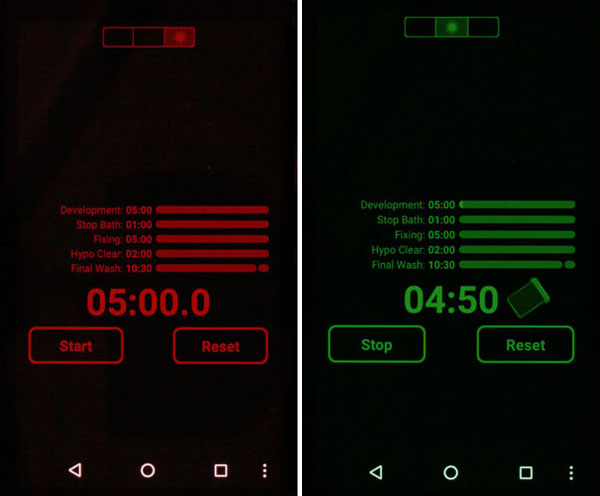
While timing the development, it is possible, by touching the icons on the top of the screen, activate safe-light modes in green or red. The idea is obviously about avoiding fogging films an papers, being the green for the form and red for the latter. Do not trust that very much. There may be a lot of white light coming out of it anyway.
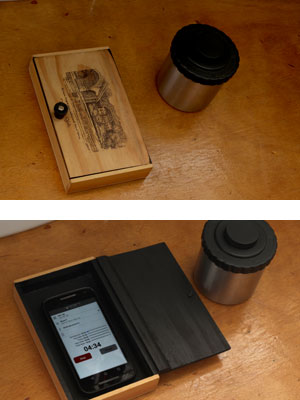
At the moment you turn off the lights it seems that it is only green or red. The background seem to be really black. But as time passes and your eyes start to move for “low light mode”, you may be surprised. It takes around 30 minutes to our eyes reach maximum sensibility and, depending on your telephone, you may realize that what seemed to be a black background is like a lamp. The red light, maybe OK, as paper is far less sensitive than film, just keep it far from the trays. But I would never develop film in a tray using that green light. That is why I made this cute wood box out of a Chilean candies packaging (if I remember quite well). The interior is painted in black for an extra protection. It is very useful even while developing in light tight tanks, as it may be crucial, in case you need it for whatever reason, to open it during development – like checking temperature. In those cases, it is good being able to shut it up immediately.
Finally, don’t forget setting your mobile in flight mode, after all, it is still a telephone.