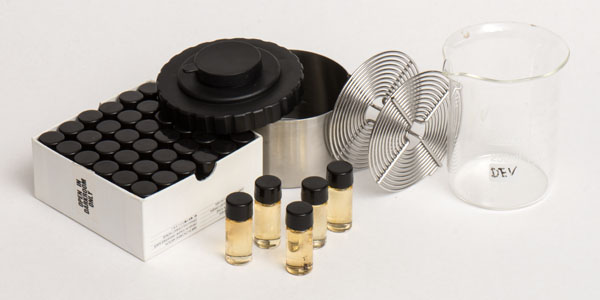
This is a developer that you can easily make at home. It is very versatile, has a long shelf life in concentrated form and is easy to use. Its formula uses dilutions of 1:25, 1:50, 1: 100, and up to 1: 200 in water. It is a great option for developing black and white films for those who develop occasionally and want to work with just one developer that is cheap and versatile.
Developer agent
Most developers created in the twentieth century use metol + hydroquinone (MH), or phenidone + hydroquinone (PH), as the base developing agents. Metol and phenidone are energetic developers and act on all parts of the image, shadows and lights: the resulting contrast is weak. A developer like Hydroquinone is less energetic and more quickly develops the parts that received more light. This results in more contrast in the final image. Then, in formulas of the MH or PH developers type, a balance is sought between these extremes by mixing the two developers in an alkaline medium. Parodinal uses a single developing agent which is p-aminophenol, or para-aminophenol, or 4-aminophenol. It is a medium energy developer, something between metol and hydroquinone, and for that reason it can result in a developer that works very well as a universal developer.
The problem for today’s photographer is that para-aminophenol is very expensive and difficult to buy. But someone has found that paracetamol, or acetaminophen (different names for the same substance) when in the presence of a very strong alkali, combine to form para-aminophenol. This made possible the formulation of Parodinal. Very conveniently, paracetamol is just the pain killer found in any pharmacy among options of famous brands or generics.
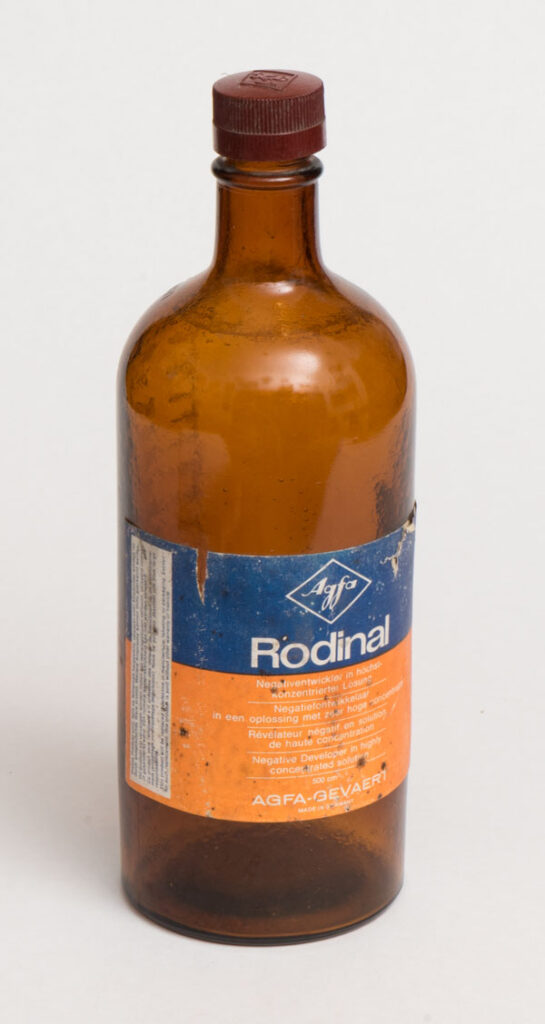
That makes Parodinal a direct descendent of Rodinal, a very famous developer in the history of photography. Launched in 1891 by Agfa using para-aminophenol as a developing agent. Rodinal was in production by Agfa itself until 2008 and then the name started to be used by other companies that acquired the right to the brand. This is a vintage packaging from Rodinal. As it was, if not the first, certainly the most famous developer to use para-aminophenol, he ended up giving the name to Parodinal.
Formula
The “pa” must come from paracetamol, but I researched and couldn’t find anything about the genesis of this developer. I don’t even know if Parodinal has a historical author or if it was something that was born collaboratively between several photographers / researchers. I also don’t know if there is an official formula. There are variations on the web, but the one that I adopted, and that has given me great results is the following:
- Water 250 ml
- Paracetamol 15 g
- Sodium Sulfite anhydrous 50 g
- Sodium Hydroxide 20 g
Note that, unlike most other laboratory recipes, this is not “water to fill 250ml”. You should start with 250ml effective and will end with a little more when adding reagents.
Ingredients
1. Water H2O
Every developer is a reducing agent, that is, it donates electrons. In the photographic development it donates electrons to the silver ions (Ag +) and these form the metallic silver grains that form the image. In this action the developer oxidizes. The developer consumes itself and after a certain point it is no longer able to donate electrons in a certain chemical system because it will be in the same potential level as the other participants in the system. The water has a lot of dissolved air and contains oxygen. An evidence that there is a lot of oxygen in the water is to remember that fish do not take oxygen from H2O, they take directly from the O2 that is present in the water in abundance. This is the oxidizer par excellence (hence the name oxidize). Oxygen competes with silver to oxidize the developer. In fact, it starts even before development in the water itself, used to prepare the stock solution, and later, even more so, in the working solution.

general reaction of photo development, red = developer / reducer
Ag is the symbol for silver, “e” is electron
To minimize this effect, developers usually have “oxygen scavengers”, normally this is the role of sodium sulfite. It is intended to consume oxygen so that the oxidizing power of the developer is preserved for when it is actually developing the photographic emulsion, reducing silver ions. But in any case, this action is limited, it depends on the sodium sulfite concentration and that is why we should always try to give the preservative agent less trouble.
Good practice tells us to work so that the minimum amount of air is dissolved in the water in which we are going to make the developer. This goes for any developer. It is impossible to reset, however, by boiling the water and quickly mixing the developer we can greatly improve the situation. The amount of air that is dissolved depends on the contact with the air and the temperature of the water, but it takes time for it to recover what it lost during the boil. It is necessary to lower the temperature and mix the ingredients without wasting time. This improves the energy and life of the developer. I boil in a beaker in the microwave and lower to 60ºC (140ºF) starting the mixture immediately.
Another point about water is that distilled or demineralized water should be used. This is simply because you never know exactly what tap water contains. At least in the stock solution this should be the norm.
2.Paracetamol C8H9NO2
The most immediate source is painkillers, in tablets or in liquid. It is necessary to make an account of the milligrams mg, of the active ingredient of paracetamol, to give the 15g of the formula. Remembering that 500 mg corresponds to 0.5 g. This means that 30 x 500 mg tablets, a format widely used in commerce, are the right measure for a recipe.
It is good to note, however, that a 500mg tablet of paracetamol, if you put it on a scale, will easily have something like almost 700mg. This means that, in addition to the 500mg of the active ingredient, plus ~ 1/3 in bulk of things that we do not know what they are, are embedded in it. This should not be a problem because on the web a reasonable number of people report using the painkiller successfully. But prefer one that has no extra features. Pain reliever with Vitamin C (ascorbic acid) may be a good combination for a flu, but it would not be for a developer. I think that generics are the most advisable because to have the lowest cost they probably put the minimum necessary in addition to the 500mg of paracetamol.
If you have the opportunity to purchase pure Paracetamol as a reagent, then you will be more relaxed in this regard. I have used it with a USP degree of purity, which is less than analytical grade, but certainly greater than in painkillers, and the results are very good. Another huge advantage is the price. It is much cheaper to buy acetaminophen as a reagent, in powder, than as a medicine. But it is also true that the medication will not weigh heavily in your pocket at all. As for the shelf life of paracetamol powder, I researched and found that at room temperature and protected from moisture it is very stable.
Safety:
Paracetamol is something we ingest, so, of course, it cannot be very poisonous in contact with the skin or even traces of paracetamol through the airways. In normal use in the preparation of Parodinal, paracetamol does not present any danger. If it gets a little on your hands, wash them when you can. Just as a curiosity, since we are talking about it, it is worth remembering that paracetamol is very harmful to the liver and should never be taken with alcohol. It is so aggressive that a 10g dose over a short period can be fatal. Four 500mg pills a day for 5 days already give already 10g of paracetamol!
For more information about paracetamol:
Paracetamol in pubChem – Paracetamol in Wikipedia
3. Sodium Sulfite Na2SO3.
Sodium sulfite is an almost mandatory presence in any developer. As said before, it acts as a preservative inhibitor of the oxidation of the developing agent because it is itself a reducing agent and competes with the developer to capture oxygen. It is a stable reagent and should be used in the anhydrous type. It has good water solubility, 27.0 g / 100 ml of water at 20 ° C, well below the concentration in the Parodinal which is 20 g / 100 ml, but it dissolves very slowly (you will see that in the video).
Safety:
Sodium sulfite is not a reagent considered to be of high toxicity. But it must not be inhaled or ingested. If there is contact with the skin it must be washed and this is enough for any danger to be removed. If it falls on the bench, collect it with a brush and shovel. I use a thick brush and a sheet of old photographic film. Sodium sulfite is regularly used as an antioxidant in fruits and vegetables to keep them fresh for longer. This happens again because of its ability to compete with other reducers by capturing oxygen. Of course, this is done in minimal doses, but it gives the impression that it is not something that is known to be carcinogenic or has a harmful cumulative effect.
A caution: you may think that some aggregates have formed inside the plastic bottle, some “stones”. You may find it a good idea to squeeze the bottle or shake it vigorously so that it returns to loose powder. There is no problem with that, however, let the jar rest closed a long minute before opening as the sodium sulphite is fine enough to form a powder suspended in the air for a few moments. If the bottle is opened immediately, you can inhale this powder. If you pour the sodium sulfite in any container, it can also happen that a fine powder is released into the air. Wear a mask or do it slowly and keeping the bottle away from your nose.
4. Sodium Hydroxide NaOH
It is one of the strongest alkalis. Its popular name is Caustic Soda. Its corrosive and fat-destroying properties make it the basic ingredient for sink and toilet cleaners. At Parodinal its role is to provide an alkaline environment that enhances the action of the developer. Every developer works best in an alkaline environment. The breakdown of silver bromides forms an acid from bromine and in this environment sodium hydroxide acts to neutralize this acid by-product preventing the Ph from falling and disrupting the action of the developer / reducer. In particular, in the case of Parodinal, sodium hydroxide is also responsible for the conversion of paracetamol to para-aminophenol, which is the real developer.
Safety:
This one is very dangerous but, fortunately, easy to control. Sodium hydroxide is usually sold in small “beads” that are 1 to 2 mm in diameter. It does not form dust to be suspended in the air, nor does it emit odors or vapors to infiltrate the airways. It can be controlled visually. Its danger comes from it being highly alkaline and causing chemical burns on the skin. In solution it can also cause burns even at low concentrations. As always in chemistry, it also depends on the exposure time. It is deliquescent, absorbs moisture from the air, and its grains are sticky and easily combine with the oils in the skin in a saponification process. This is very fast. If it comes in contact with your skin, wash it off immediately. You will feel it like a soap. Wash until your skin is free of this slippery sensation and when you are done with that, continue and still wash for a while. You will feel the same way if you have contact with the developer itself. But in the developer, working solution, the NaOH will already be diluted to 8% and washing your hands well will solve it easily and efficiently if you are quick. Never leave it on your skin. Even though the skin is a very good barrier to external aggressors because its most superficial layer is made up of dead cells, sodium hydroxide attacks this barrier. In the eyes, this barrier does not exist for something strong like NaOH. A sodium hydroxide burn can blind you. Wear safety glasses.
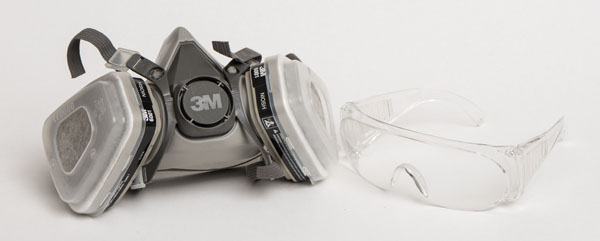
Goggles and a mask are easily found and help a lot to avoid accidents. The mask, for general use in a photo laboratory, must be of the type that does not allow the passage of particles and also organic vapors. Talk to your supplier to see the brand / model he recommends in this regard.
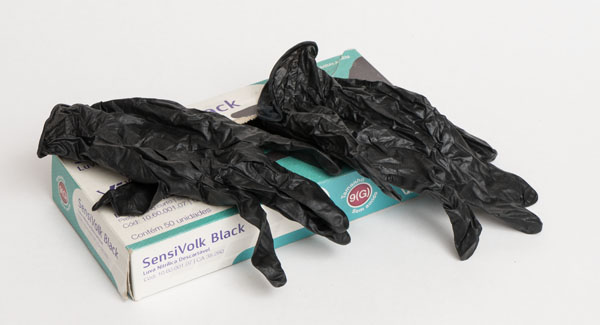
Likewise, nitrile gloves, which are more resistant than latex gloves, are also highly recommended protection. Long-sleeved clothes, long pants and closed shoes complete a good set of individual protection measures.
In any case, to minimize these risks, it is not necessary to dress like a diving suit. The best thing is to avoid the reagents going where they are not supposed to. Here are some considerations that may help in this direction:
- Buy small packages of 1000g or 500g even though the cost per gram is higher. Big accidents happen more when handling large loads.
- Move steadily and slowly when handling a chemical like this. But bear in mind that it is not because it is dangerous that you should handle it at your fingertips. On the contrary, hold firmly, embrace containers and utensils with your whole fingers. The lye does not come out of the bottle, or glass, or beaker alone if you keep them upright. Touching the outside of the bottles and lids is no problem as long as you keep them clean.
- Wearing safety gloves is a good measure, but it does not release you from taking all these precautions so that the reagent does not have contact with anything other than the containers. It is not because you are wearing gloves that you will treat lye as if it were sugar.
- Have everything you are going to use handy and avoid getting back and forth, getting up and sitting at the weighing or preparation site.
- Open and close the bottles so that they remain open for as little time as possible (not least because sodium hydroxide absorbs water from the atmosphere and deteriorates).
- It is very important to have plenty of running water at all times where reagent mixes are made. If you are going to improvise a laboratory it has to be in the bathroom or in the kitchen. Never count that nothing will happen.
- Beware of disposable cups that have very thin walls. Sometimes they have a crumpled bottom that suddenly crumbles with a spring effect and can throw NaOH grains relatively far. Check that the bottom is flat and free of tension or prefer stiffer containers.
- If it falls a little or a lot on the counter, without panic, remove what is solid with a brush and shovel, discard it in the sewer (the sink plugs sold at the supermarket are practically pure NaOH). Clean the area with a wet cloth that you should wring, rinse and reapply several times until you realize that what remains is only residual. Obviously do this with good gloves.
A final observation is that sodium hydroxide, when diluted in water, releases a considerable amount of heat. As we are talking about 20g in 250ml of water, this will not be a dangerous effect. But you will certainly notice a rise in temperature just by holding the beaker. Don’t be surprised, this is normal.
A one shot developer
An important feature of Parodinal is that it does not hold up well once it has been diluted in the working solution. Perhaps because it is concentrated and needs a great dilution, the concentration of the conservative Sodium Sulfite drops a lot and oxidation happens quickly. Pierre Grafklides in his classic Chimie et Physique Photographiques, points out in this regard that: “Sulphite solutions, with a concentration below 20% oxidize very quickly. The change is less sensitive in the presence of a reducer [which is the case of para-aminophenol of Parodinal], by the reciprocal anti-oxidant action “. Well, the concentration of sodium sulfite in the stock solution is 20% (50g in 250ml of water), but when diluted 1:50 in the working solution this concentration drops to 0.4%. Even in the presence of the developer / reducer, this concentration may be too low for sodium sulfite to considerably prevent accelerated oxidation.
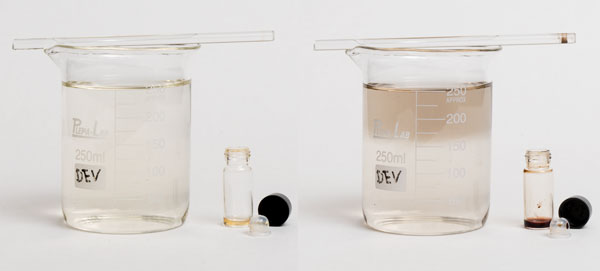
The result is that once diluted, Parodinal should be used immediately. Even at the end of a 10-minute development, it is already possible to notice a darker brown color that will darken even more in a short time. The photos above were made with the Parodinal diluted 1:50, at room temperature, around 23ºC (73ºF), at time zero and 4 hours later. This is the oxidation of the developer in contact with air only, with no film development.
The good thing about using a one shot developer is that we have a very high consistency of results. We don’t have to worry about whether it is new or how many times it has been used. There is no reinforcing bath and nothing like that. This would be problematic only if its cost was high, but that is not the case at all.
The mono-doses
If in a liter of fresh water we find 8 cm³ of oxygen, we have 210 cm³ of oxygen in the same volume of air under normal conditions of pressure and temperature (Wikipedia). This obviously means that air is potentially much more harmful to a developer than the water in which it is diluted in the stock solution.
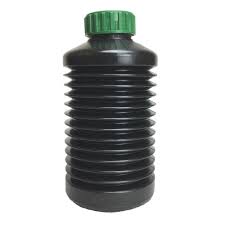 There are accordion bottles that can collapse so that they are always filled to the top, but they are difficult to wash and never collapse to zero. There are tanks with floating lids but the air is renewed by the edges of the buoy. Some people fill the developer bottles with glass balls to replace the space left by the liquid, but the excess of internal surfaces ends up exposing the developer even more to the action of air. There are sprays with heavy, inert gas that can be used to complete the developer bottle. This is the best solution so far, but it is expensive and with the reduction of analog photography market it is no longer so easy to find these sprays. There are several strategies to minimize the amount of air inside the developer bottle. But they always fail in that it is necessary to open the bottle and this act always renews the air, however little it is, and thus provides more oxygen to spoil the developer.
I have adopted a procedure that seems ideal to me. Right after preparing the Parodinal in a closed and fully filled glass, I divide the stock solution into small jars of only 5ml each. The amount of air is minimal and the small bottle will only be opened once to use the full contents, since it is a one shot developer as we saw just above. When developing a 35mm film I use one of these mono-doses in 250ml of water. This is the right measure at 1:50 dilution in a standard stainless steel tank. If it is a 120 film I use two mono-doses in 400ml tanks resulting in a slightly stronger 1:40 dilution. For plates or sheet film in trays, I usually use 5 ml per plate with an even stronger concentration. It is preferable that when developing in trays we shorten the time. In large format, the most accentuated grain that forms, is not a problem.
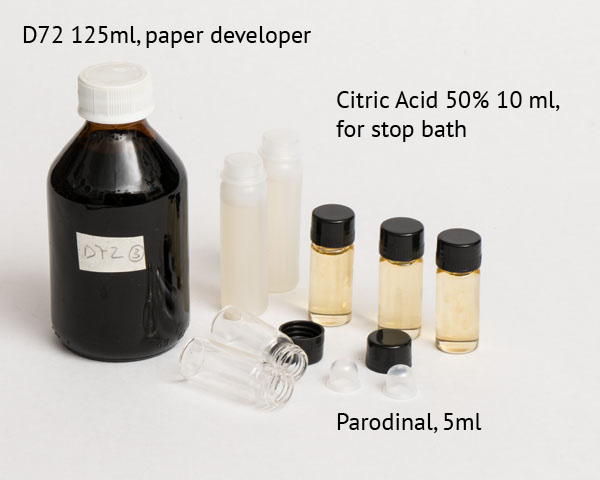
This method also has the advantage that it is easy to know how many films you can still develop and at the time of developing you do not need to measure the volume because it has already been measured only once. I dirty and wash the pipette once and make just over 50 jars with a 250ml water recipe. I liked this system so much that now my stop bath is also always at hand in solutions of 50% citric acid in plastic bottles of 5 and 10 ml. My paper developer, the D72, I keep in 125ml glass flasks and diluted in 1: 4 is perfect for a photo printing session up to 10 or 15 18×24 cm copies. For developers, I prefer glass bottles because they usually close better and are more impermeable to air than plastics. I reuse the two and so far it looks like they will outlast me.
How to prepare
Finally, let’s get ready. This recipe is for 250ml of water as a base for the stock solution. It will give a slightly higher final volume due to the addition of reagents. For other quantities just do it in the same proportion.
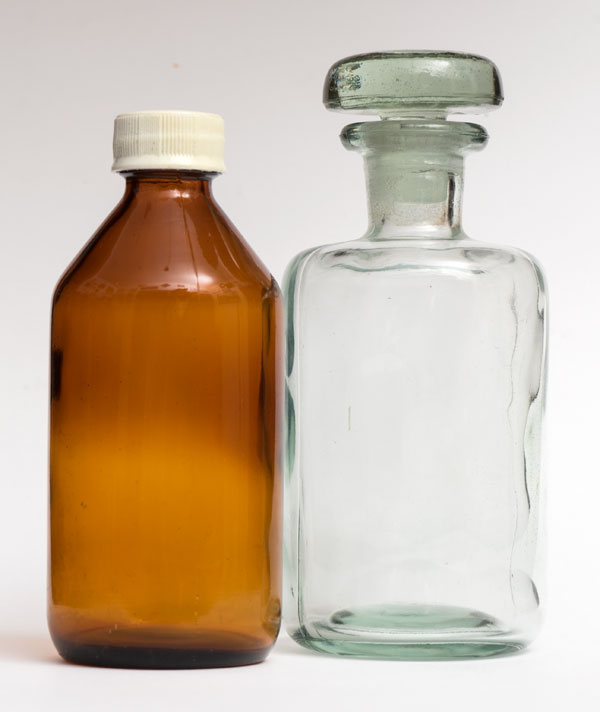
- Choose a glass bottle that can be well capped and that has 250ml. This usually leaves extra space and is good as it will be used by the reagents. Usually amber glass is recommended. I have been using this crystal glass to be able to follow the sodium sulfite dissolution that, in the case of Parodinal, occurs in the closed flask, as you will see in the video, and this has never caused me any problems.
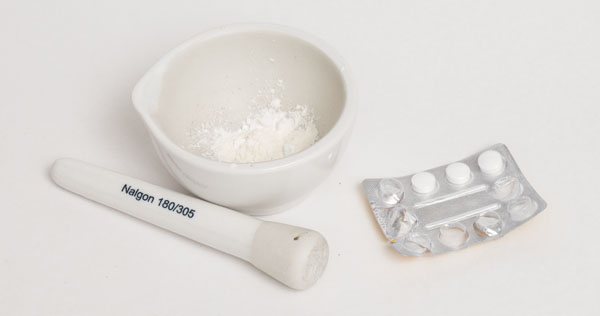
- Weigh the reagents according to the formula already mentioned, paracetamol 15g, sodium sulfite 50g and sodium hydroxide 20g. If you are using the painkiller you must crush the pills in a mortar like the one in the photo to make them powder. 30 tablets of 500mg or equivalent will be required. Another technique is to place the pills in a very strong plastic bag and crush them by tapping them with a hammer.
- Do not rely on a beaker to measure the water. It may even be that yours is marked correctly, but usually they are not. Use a graduated cylinder or cup. Measure 250ml and transfer to a beaker. Boil the water and wait to lower the temperature to 60ºC without stirring.
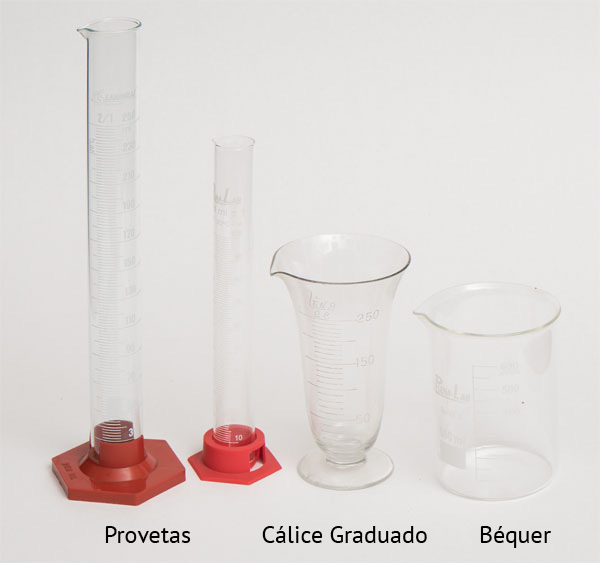
- Place ~ 200 ml of water in the beaker and leave the rest separate for later.
- Pour Paracetamol, mix a little without worrying that it will dissolve completely. It is enough that there are no lumps or large pellets on the surface, as this indicates that these are dry inside. The important thing is that it gets all wet. Stir gently with a glass stick. Do not shake too much to not dissolve air in the water.
- Then pour the Sodium Sulphite and proceed in the same way. Finally pour the Sodium Hydroxide more slowly and continue stirring gently. The temperature will rise considerably with Sodium Hydroxide. This is normal.
- Now pour the contents of the beaker into the glass jar with the help of a large tipped funnel (or it will be clogged). Many solid sediments will remain in the beaker. Use the water you have separated to help load these solids into the jar as well. You can also expect to decant a little what’s in the bottle and return liquid to the beaker to help get all the solids into the bottle.
- Cap the bottle tightly and let it rest for two or three days. A lot of people recommend that this be done in the dark but I don’t think it is necessary. Just avoid very bright light, such as good laboratory practice. In my experience, ambient light does not seem to affect the parodinal.
- This period is to allow time for the Sodium Sulphite to dissolve. If there is a lot of anxiety you can invert the bottle from time to time. But don’t worry, there is movement even inside a still liquid and dissolution will occur. If something remains at the bottom of the bottle, there is no problem. Proceed to step 10.
- Filter the developer through a paper filter, the type used for coffee.
- Use a pipette with a rubber pear (pipettor) to fill the 5ml vials and cap them tightly
At this point you will have, ready for use, a very good developer for more than 50 35mm films or the equivalent in other formats.
The video
Descriptions are important but do not give the notion of appearance and procedure in the same way that a video can. So I recorded a production of a batch of Parodinal mono-doses. In the video you will see how the initial mixture looks like, the way the Sulfite dissolves over time and the way to store the stock solution in small mono-dose vials that are ideal for storing and using a concentrated developer and single bath. So watch the video to complement what you have read so far.
The Pipette
In the video I use the pipette in a way that is not “official” but it is faster. Here is an explanation for those who have no experience with pipettes:
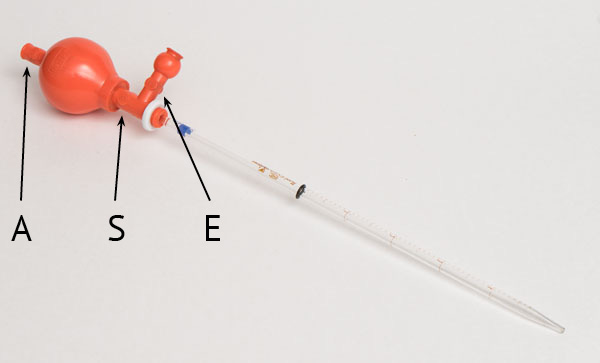
- The rubber pear has 3 valves that open when you finger-tighten them. Valve A only serves to expel air from the bulb. Squeeze it and compress the bulb. It should be partially deflated. Release the valve while the bulb is compressed.
- With the bulb deformed, dip the tip of the pipette in the liquid press the S valve. You will see the liquid rising up the tube. Release valve S to close it when the liquid has reached the desired graduation.
- To discharge the liquid in the 5ml bottle “the right way” is to compress the E valve. The E valve is also used in the case where you have drawn too much liquid and need to lower the level. It allows air to enter the tube and the liquid to drain. When emptying, there will be a remnant at the tip of the pipette that you can expel by pressing the little ball near E. You can do it this way but the process is very slow as it depends only on gravity to lower the liquid.
- The “wrong” way, but more efficient, is to compress the pear and when it is already forcing the valves you release the S valve. The air inside the pear will expel the liquid at the speed you want. It depends on how much you tighten the large bulb. This way is wrong because if you mistakenly compress the S valve without putting enough pressure on the bulb, it will suck the liquid into it! Then you will have to wash your interior by sucking clean water, shaking and expelling it several times.
- Train with water before doing with chemicals. A pipette is a great help in a photo lab and is very worthwhile to have and know how to measure small volumes of solutions.
Characteristics and usage of Parodinal
Acutance
Parodinal is a high-acutance developer, that is, if a passage between a very light area and a very dark area is very abrupt in the image generated by the lens, if it is very sharp, if it is like a step and without halftones, the developer will also be able to render it very shart and without halftones in the passage. The chemical development process tends to smooth these passages, ranging from black to white through a thin gray stripe. In the Parodinal this gray band is minimal and that is what means high acutance. The result is an image with a very sharp cut. It’s great for rendering details. But it is clear that this depends in the first place on whether the lens is actually producing an image that presents these drastic passages. If it is an out-of-focus image, for example, the sharpness will not be perceived.
Grain
Another feature is that Parodinal forms relatively large grains. This depends on the film, the developing temperature and the dilution. Everything that in the development makes the process slower, low temperatures and high dilution, helps to minimize the grain size. I usually use the Parodinal more with films ISO 100 (Foma100), 125 (FP4) and with dry plates, and the grain never results in anything that disturbs prints up to 24 x 30 cm (~ 10 x 12″) even from 35mm film. I normally develop at 20ºC and 1:50 dilution. My times are around 10 min with agitation every 30s. I have already tested 15 min without agitation and the result was also very good. With ISO400 films the grain is already more pronounced but I believe that it still doesn’t steal the show. Looking at the photo we still see the image and not the grain. But with HP5, for example, I have preferred to use Pyrocat HD. But if you see the grain as an aesthetic possibility, then it is possible to make it appear a lot using Parodinal with higher ISO films and higher concentrations and / or higher temperatures. But, as always, these considerations are only starting points for your own experiences. A homemade developer does not have the same constancy as industrialized developers.
To wrap-up
In conclusion, I think I can say that the Parodinal is an encouragement for those who make analog photography because it makes sure that at least one developer will always be at hand. In times of increasing restrictions on access to chemical reagents, we can count that at least the painkiller will always be available and the other two, sulfite and sodium hydroxide, are so widely used in industry and as commonplace as reagents that they are likely to be equally within reach. If that wasn’t enough, the developer itself is very practical and capable of producing great results.
Thanks a lot for this detailed recipe.
I would have a question, do you need to fix after developing with Parodinal? If so what would you use?
Thanks again
Augusto
Yes, the film needs to be fixed and a stop bath in between is also recommended. As stop and fixer I use the recipes you can find in this page: mix your own formulas
Thanks a lot for your reply
I made a batch, but after 3 days, there seemed to be more sediment at the bottom of the bottle (nearly 1/3 the volume) than when I started. It had sat out the three days in my basement at 13°. Was that too cold?
I tried to filter it, bit it clogged the filter and only a few ml made it through after a 1/2 hour.
Yes, I think 13º is probably an obtrusive temperature for the reaction to take place. But I can’t be sure about it. Theoretically, low temperatures slow down chemical processes, maybe the best strategy would be to ignore the first 3 days, bring it to room temperature, about 25ºC and give it a second chance. There is only one way to things go right and several ways to go wrong. In your place I would just do it again avoiding that temperature condition.
Fantastic possibility of a home made developer. One question, Do you have the possibility of making this developer with any changes, as a very fine grain developer? I’, asking you this because one of my main camera negative is the Minox spy cameras of which I have 5 different models, that render 8 x 11mm negatives, thus I need to have a fine grain developer.
I appreciate your help.
Best regards,
EDUARDO (From Colombia)
Hello Eduardo, I am sorry but I don’t have any variation from this fórmula. What you can do is to try different development parameters. For instance, longer times with more diluted developer, or lower temperature. Using low ISO film the grain is finer and even with such a small negative maybe you can find something that suits you. I have a Minox and I normally use Ilford Delta 100, or Tmax100, and develop in Pyrocat HD or 510 Pyro. The best compromise, is to consider the grain as part of picture aesthetics. Depending on the subject that may be really interesting.