Perspective correction with an enlarger
Most of the old medium and large format cameras had the possibility of raising the lens and/or tilting the lens and/or film/plate holders. These movements served to “correct perspective” at the moment the picture was taken. Correcting perspective means in this context making vertical lines, usually from external or internal architectures, walls, doors, columns, etc. remain vertical in the photograph even when you point the camera upwards.

Leaned camera without correction

Leaned camera with correction
In the uncorrected photo we see that the church’s vertical lines are converging to a high point outside the photo. In the corrected image they are much more parallel to the lateral edges of the photograph, that is, they remain vertical. There is no right or wrong in these two ways of representation.
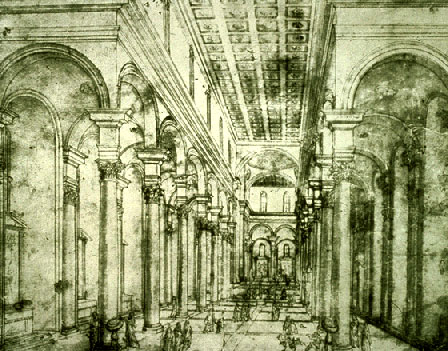
But it turns out that by a tradition that dates back to the Middle Ages in our culture and gained a scientific version in the so-called Geometric, or Linear, Perspective of the Renaissance, we are more accustomed to find beautiful an image in which verticals appear truly vertical. As in the drawing above for the central nave of St. Lorenzo’s Church, Florence – early 15th century, made by Filippo Brunelleschi (1377 – 1446), just one of the theorists of this kind of perspective drawing.
Well, but if you have a camera without perspective correction and anyway would like to straighten the verticals of your photos… there is a way. All you have to do is invert distortion on your enlarger by tilting the paper plane.
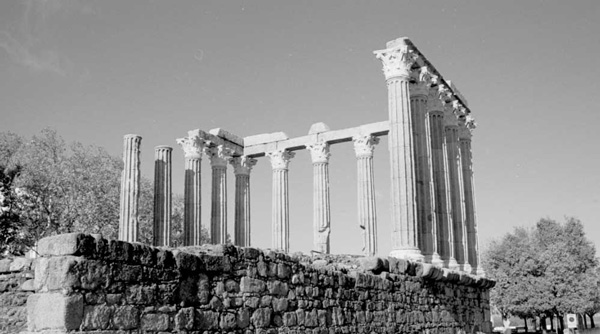
This image is a direct scan of the negative of a photo taken at a Roman temple in the city of Évora, Portugal, it was taken with an Olympus OM1n and a 50mm lens. I needed to tilt the camera up a bit so I could put the whole temple in the picture. Otherwise, if I left the horizon right in the middle of the photo, I would take a lot of ground (which has been cut even further in this image) and leave the tops of the columns out of the photo. With this option the columns came out just as if tumbling back a little.
To remedy the situation at the time of enlargement I tilted the paper. The logic is that as the beam of light is tapered, what approaches the lens gets smaller and, conversely, what is further away grows.
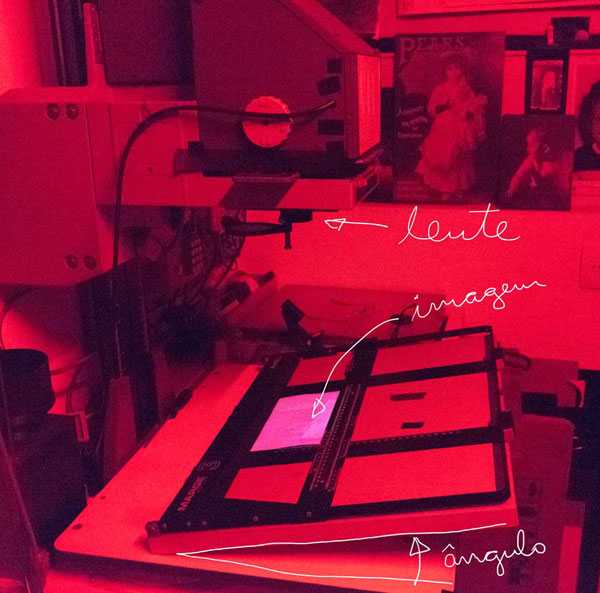
The situation then was something like this. To focus it is necessary to aim the center of the photo and stop down the diaphragm. There is a depth of field effect and with the iris tightly closed you still get a focused picture all across the image.
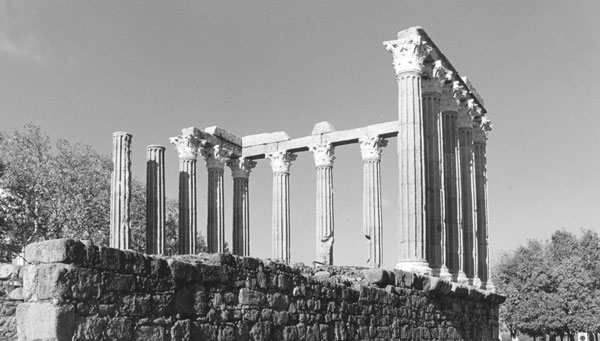
The end result was a better corrected photo as seen above. I don’t think it’s worth doing the math for that kind of thing. This is not the case with trying to measure angles, calculate lens depth of field. Being in the lab the most practical thing is to move the easel, the focus, turns again to the easel and so, interactively, you look for the arrangement that seems the best. There are more sophisticated enlargers that allow you to tilt the film plane as well, perhaps in these cases a more careful and calculated procedure would be better and save time.
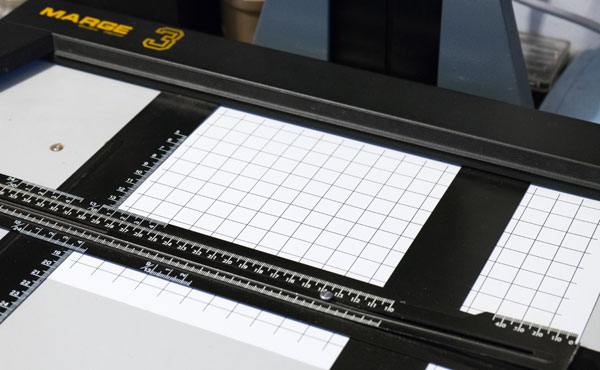
One thing that helps is to have a checkered sheet that serves as a template for both horizontal and vertical and thus allows a more accurate assessment.
This feature is not only useful for geometric subjects. We often make portraits with more angular lenses and then realize that they make everything that was closer too big. You can use the same logic to soften it, even though you will rarely be able to completely fix this problem. The general principle is to go up with the side of the photo where there is an exaggeration of some element and there observe the effect of making it smaller. The problem is that there will always be a counter effect on the other side. You need to find the right balance.

Excelente artículo, pensé en comprar un objetivo tilt, pero con esta técnica haré la corrección en el lab.