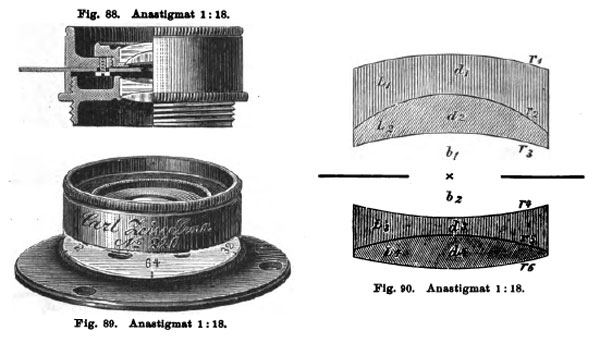
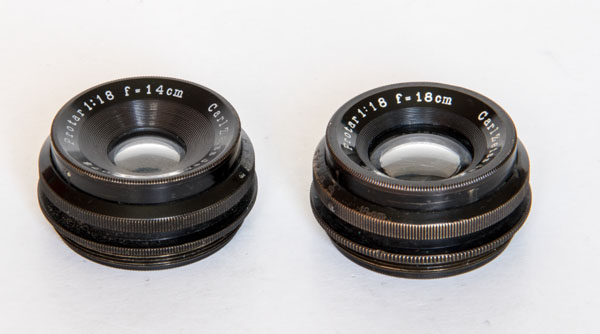
This is a lens that by its look and size does not claim much. It could easily be taken as an enlarger lens or something alike. But it’s actually a powerful wide-angle lens.
A lens launched by Ross, England, called Concentric is considered the first anastigmatic. Soon after, Carl Zeiss, came up with a lineup created by Paul Rudolph, and launched in 1890. They were named anastigmat in German, the same spelling in English, and anastigmatique in French, as a trade name. The origin is Greek, where stigma means point. Anastigmatic is a double negation, it is like non-non-point. The reason is that the lenses until then produced from points images that were actually discs, they were non-points. In this sense, the new and corrected lenses, possible thanks to the invention of a new crown glass with barium, would be the non-non-point lenses. A scheme showing what the astigmatism problem is, can be seen on the Protar VIIa page.
Being anastigmat a category name, a name from optics, other manufacturers adopted it as well and Carl Zeiss decided to change it to Protar, a name that could be registered as a proprietary name. Thus launched a series of Protars for various applications with f/4,5 apertures for portraits up to f/18, the Protar V, for architecture, interiors and reproduction. The more luminous Protars were soon replaced by Tessar and Unar, also new anastigmats, which were simpler to manufacture and produced great results at a lower cost. The Protar V continued in Zeiss’ catalogs until the 1930s (Kingslake).
A very important feature commented by Eder in his Ausführliches Handbuch der Photographie of 1899 is that even with aperture 1:18 Protar V produces an image with even illumination across the whole image circle. It is very common for wide-angles to have a fall-off problem, that is, that the exposure at the edges is much lower than in the center. To circumvent this problem they need to be closed down a few points, often exceeding the seemingly limiting 1:18. The Protar V, although starting with an already dark aperture of 1:18, does not offer this problem and can be used wide open.
Design consists of two cemented doublets, not symmetrical, and for this reason, although uncoated, it does not suffer much from unwanted reflections and offers satisfactory contrast. Another interesting point, specially for a lens that old, is that it is very easy to clean, it disassembles completely through threads. But overall, those who had such a lens were probably professionals and the ones I’ve seen were all in a fairly good working condition.
The openings are 1:18, 25, 36, and 50. The idea behind these unusual figures, for an aperture scale, is that, always following the formula/concept of aperture as the ratio focal length/entrance pupil, from 1:18, the next figure corresponds to 18 x √2, the next is (18 x √2)x √2… , to ensure that at each marked point the exposure is half the previous exposure. For the purpose of light metering it is perfectly valid that you interpolate visually with the scale of the usual numbers f / 16, 22, 32, 45, 64.
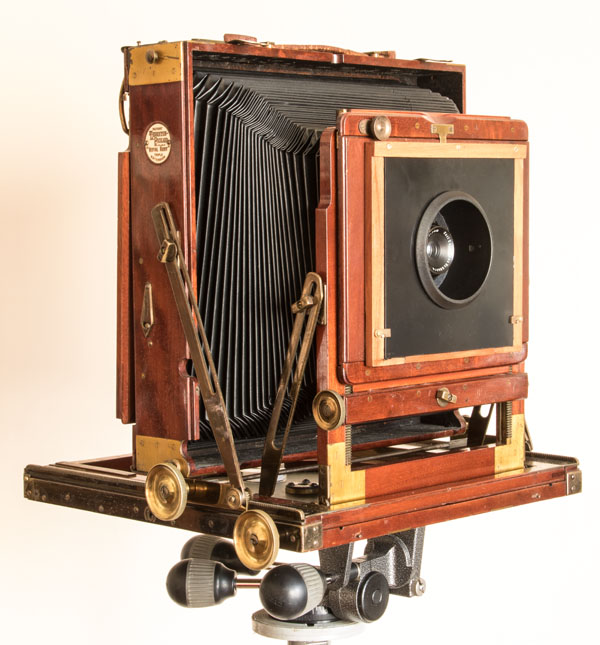
To mount the 14cm Protar V on an 18×24 cm camera I found interesting to make a recessed lens board. For that I used a Durst enlarger recessed lens board. This is an accessory for very short focal lengths, when even contracting entirely the bellows the lens is still far from the film in the enlarger. In this Thornton Pickard the focal length of 14 cm would be still workable. But the recessed lens board helps by adding some more room for movements to the lens. Since it is so interesting for urban scenes and architecture, this is a very desirable feature.
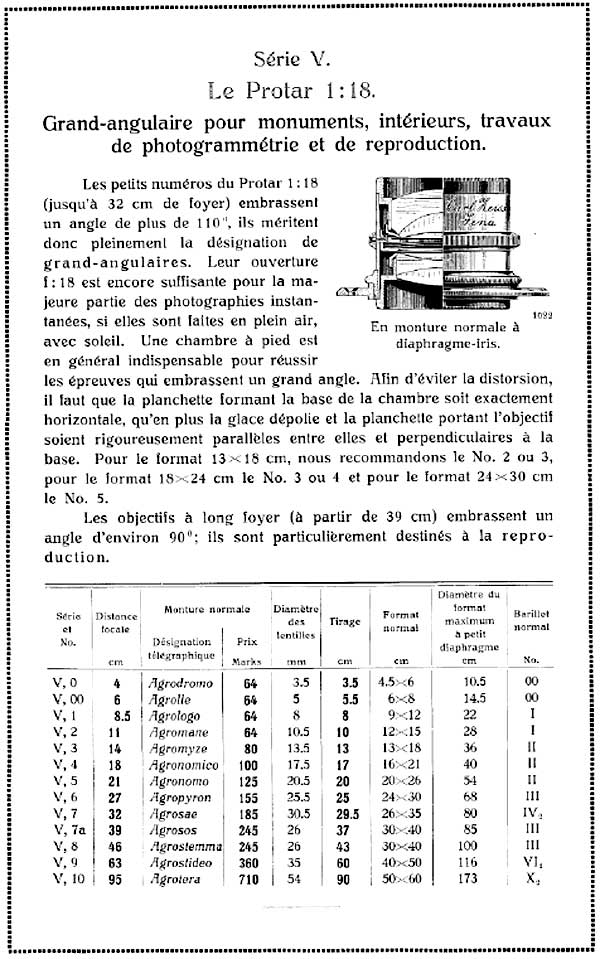
This is a page of the Zeiss catalog from 1911, for French market, where we can see all available sizes for Protars V and critical dimensions. In the table is indicated what they consider “normal format”, that would be 13 x 18 cm, but Protar V of 14 cm, in the text, is indicated for 18×24 cm. In the table we see that its circle of image is of 36 cm. At 18×24 cm this results in 81º of horizontal viewing angle, in landscape orientation, and 65º of vertical viewing angle in portrait orientation.
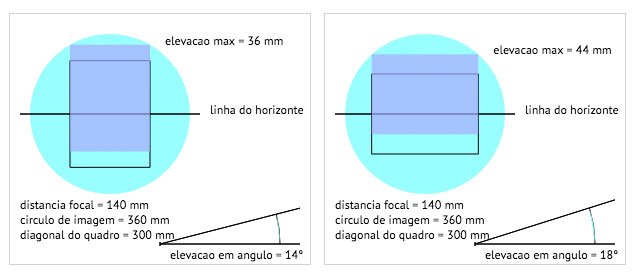
The 36 cm image circle leaves a certain margin for moving the lens and lowering the horizon line to 1/4 of picture height, in landscape orientation. This simulation can be done on the Front raise and the Horizon Line. But it is necessary to have a camera that allows elevation of 36 and 44mm respectively. Tilting the film and lens backwards also produces the same effect.
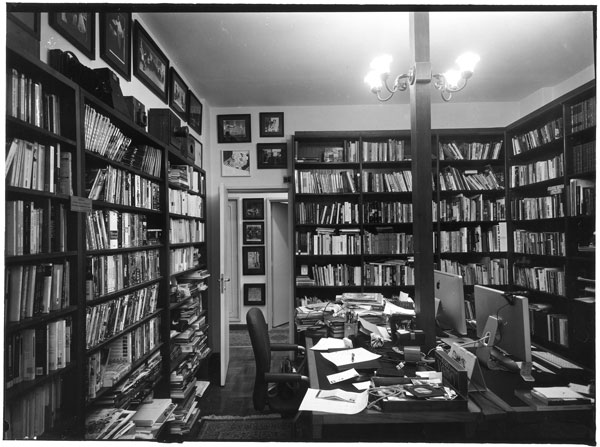
Interior photos give an incredible definition even at shorter distances. In the original negative it is possible to read the names of the books in the back and also the ones in the foreground. The aperture was f / 36 and the 2 minute exposure with the room lit only with these ceiling lights. The film was a Fomapan 100 18×24 cm.
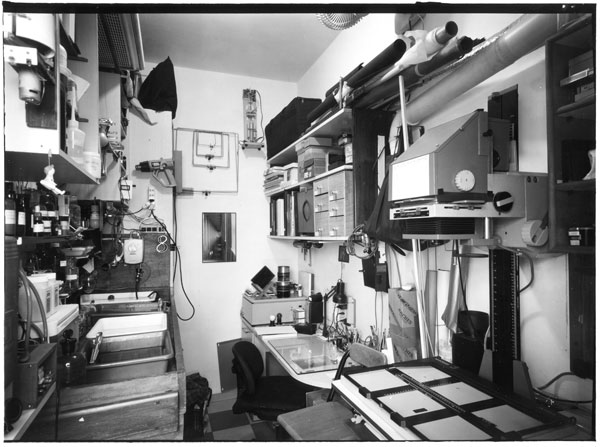
In this photo from my darkroom, the film and lens plane were perfectly vertical, but the lens axis was not perpendicular to the wall in the back. This angle a created second vanishing point and in the foreground the wet bench appears to rise toward the center of the photo. This can be improved with movements of the film plane and / or lens. But the Thornton Pickard Royal Ruby does not offer these moves.
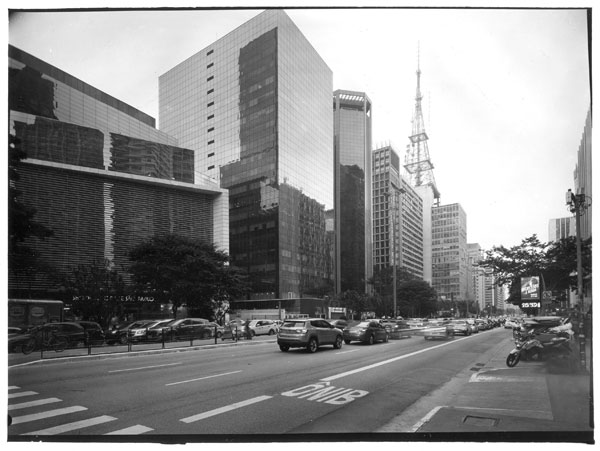
In this out-doors photo I also used again the Thornton Pickcard 18×24 cm. With a front raise the horizon line fell to about 1/3 of the frame. The image above corresponds to the whole negative, only to show how a very tall building can be framed at a relatively small distance, but normally these photos with such large viewing angles are cropped to make up a better composition, to get rid of the excess of floor in the foreground, for example.
Comment with one click:
Was this article useful for you? [ratings]

